
YOGYUI
Dyson Pure Hot+Cool 애플 홈킷 연동하기 (Homebridge) 본문
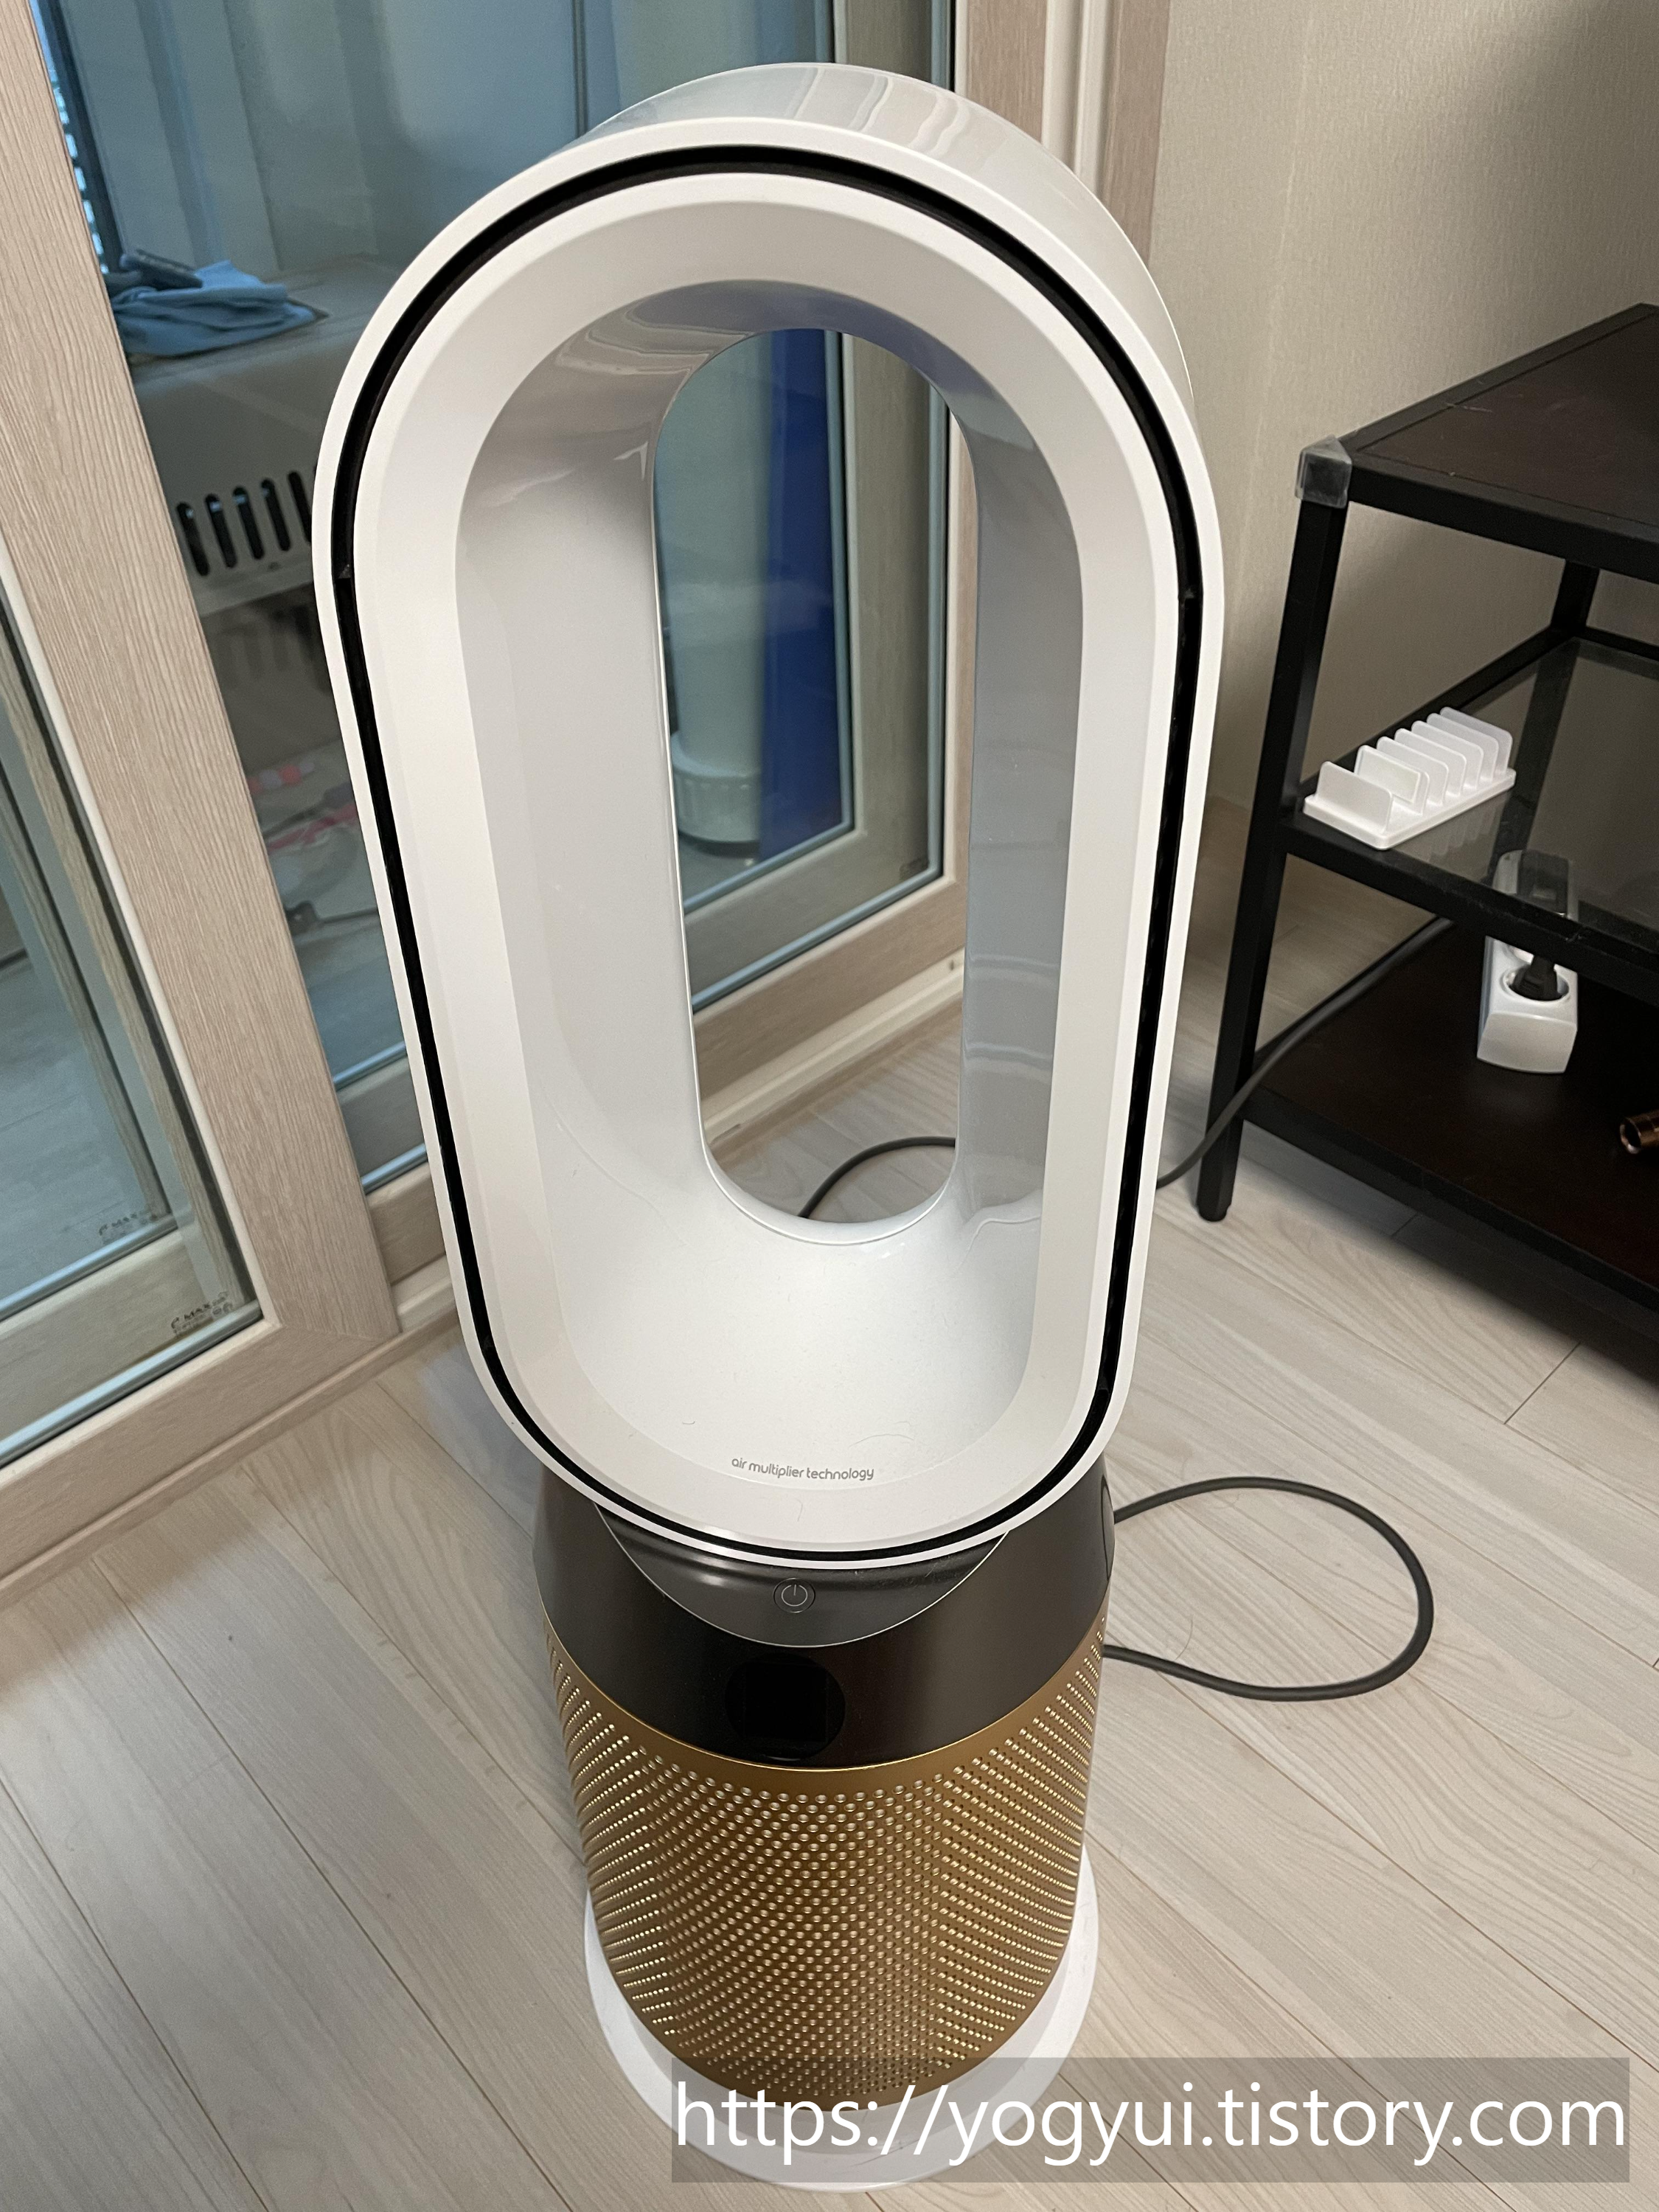
다이슨에서 만든 핫앤쿨 포름알데히드 공기청정기 제품 pure hot+cool cryptomic (HP06) 제품을 2년 가까이 사용해오고 있다
(겨울에 쓸 온풍기로 샀는데, 선풍기로도 성능이 굉장히 좋아서 사계절 내내 애용하는 제품)
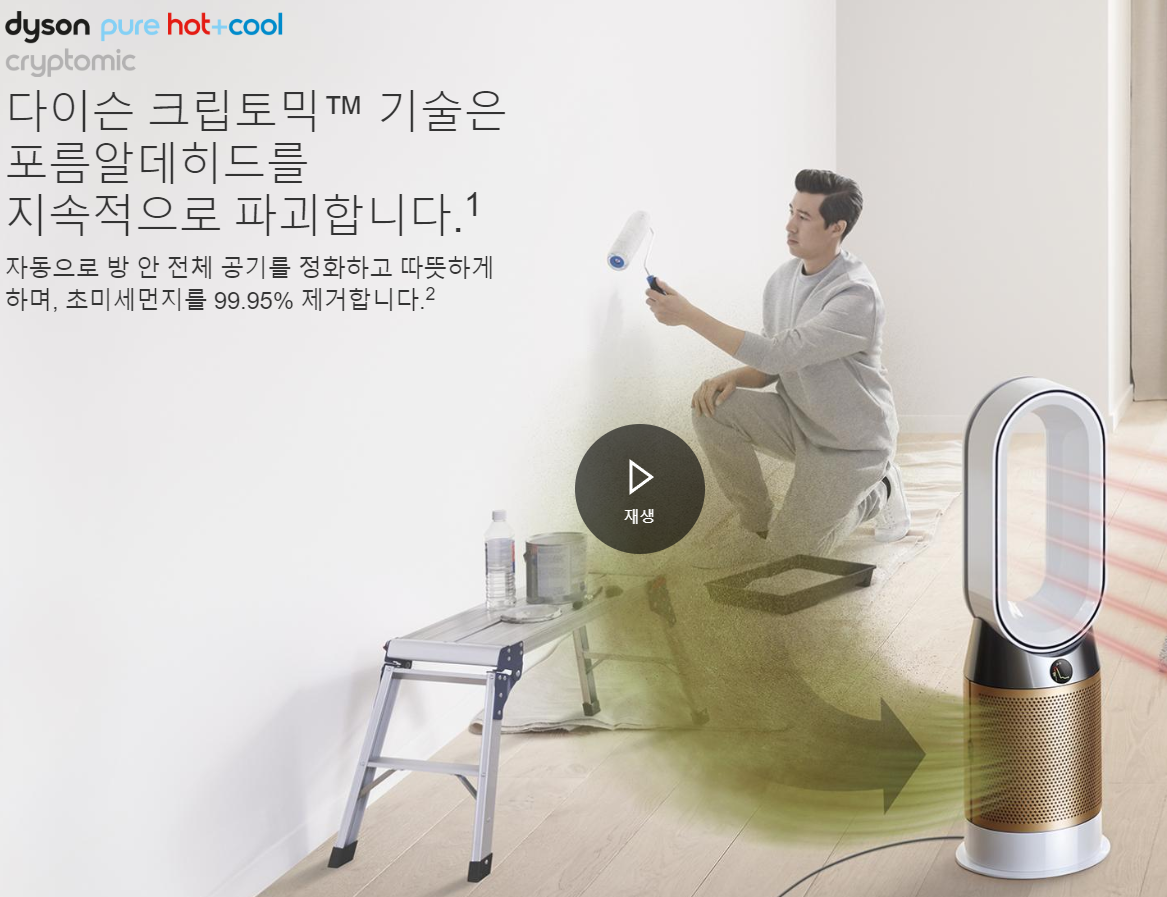
새집증후군 주요원인인 포름알데히드를 없애준다고 해서, 새집으로 이사한 뒤에 틈날때마다 빵빵하게 틀어놓고 있다 ㅋㅋ
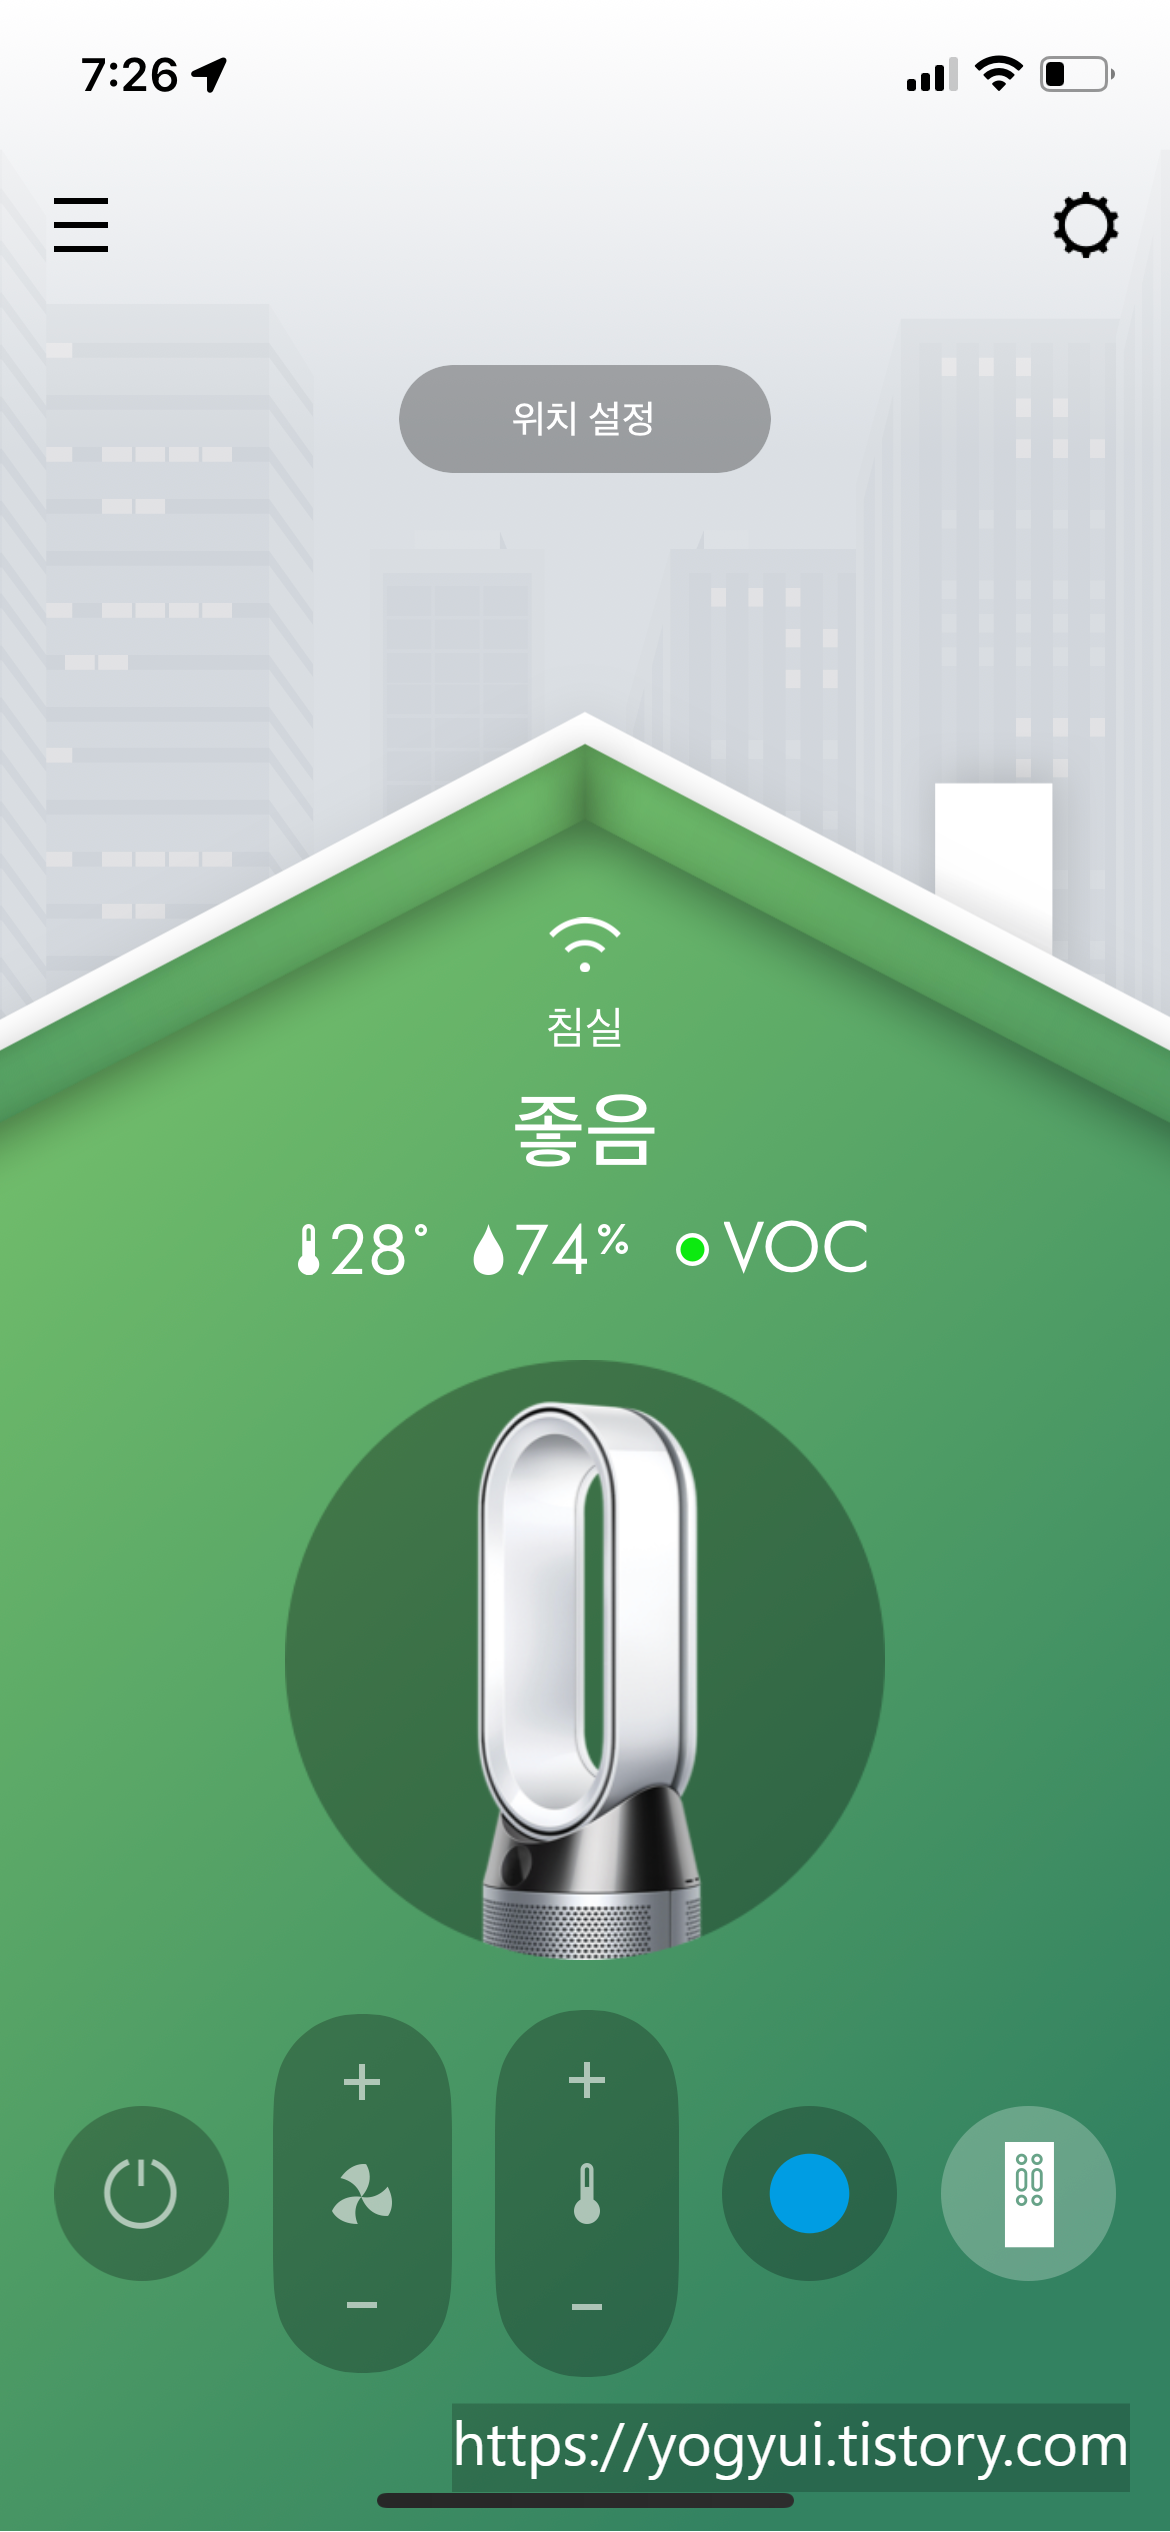
다이슨의 최신 제품은 스마트폰 어플리케이션(다이슨 링크)과도 연동되어서, WiFi를 통해 연결된 기기를 원격으로 제어할 수 있다 (실내 공기질을 시계열 plot으로 확인할 수도 있다)
Dyson APi는 Home Assistant와는 자동으로 연계가 되는데, 애플 홈 앱과는 연동하는 방법을 몰라서 이제껏 별도의 앱으로만 구성했었는데, 얼마전에 웹서핑하면서 Homebridge를 통해 애플 홈 앱과 연동하는 방법을 알게 되어서 실습할 겸 포스팅해본다
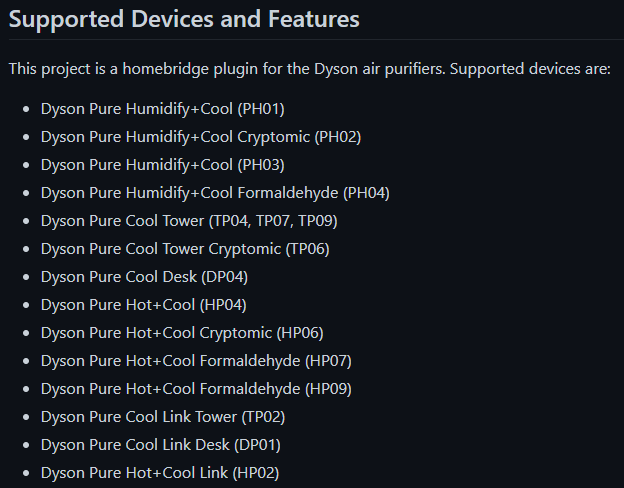
요약: Homebridge의 'Dyson Pure Cool' 플러그인을 사용해서 애플 홈 앱과 연동해보자
https://github.com/lukasroegner/homebridge-dyson-pure-cool#readme
GitHub - lukasroegner/homebridge-dyson-pure-cool: Plugin for using the Dyson Pure Cool fans in homebridge.
Plugin for using the Dyson Pure Cool fans in homebridge. - GitHub - lukasroegner/homebridge-dyson-pure-cool: Plugin for using the Dyson Pure Cool fans in homebridge.
github.com
[난이도]
★★☆☆☆
[요구사항]
1. Homebridge 구동 환경 (라즈베리파이, NAS 등)
2. Homebridge에 대한 기초적인 지식 (config 파일 설정)
3. Dyson 앱(아이폰, 안드로이드)에서 계정 설정(이메일) 및 Dyson 장치 추가 완료
주의: Dyson 앱과 연동가능한 공기청정기 제품만 적용할 수 있다
1. 플러그인 설치
홈브릿지 플러그인 검색창에 'dyson'을 타이핑하면 Verified된 플러그인인 'Homebridge Dyson Pure Cool'을 찾을 수 있다
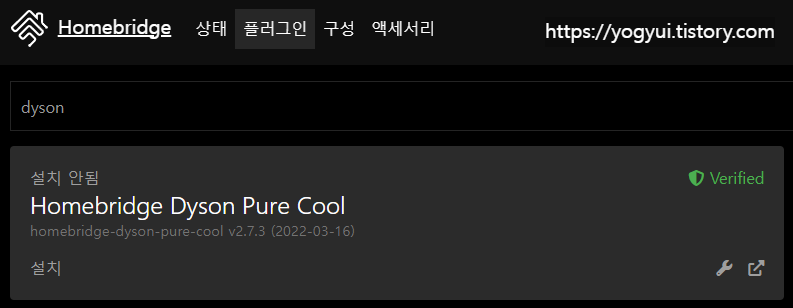
'설치' 버튼을 클릭하면 자동으로 설치과정이 진행된다

설치가 완료되면 디바이스 설정 UI가 나오게 되는데, 현재 단계에서는 무시하도록 한다 (나중에 스크립트로 설정하는 것과 내용은 동일하다)
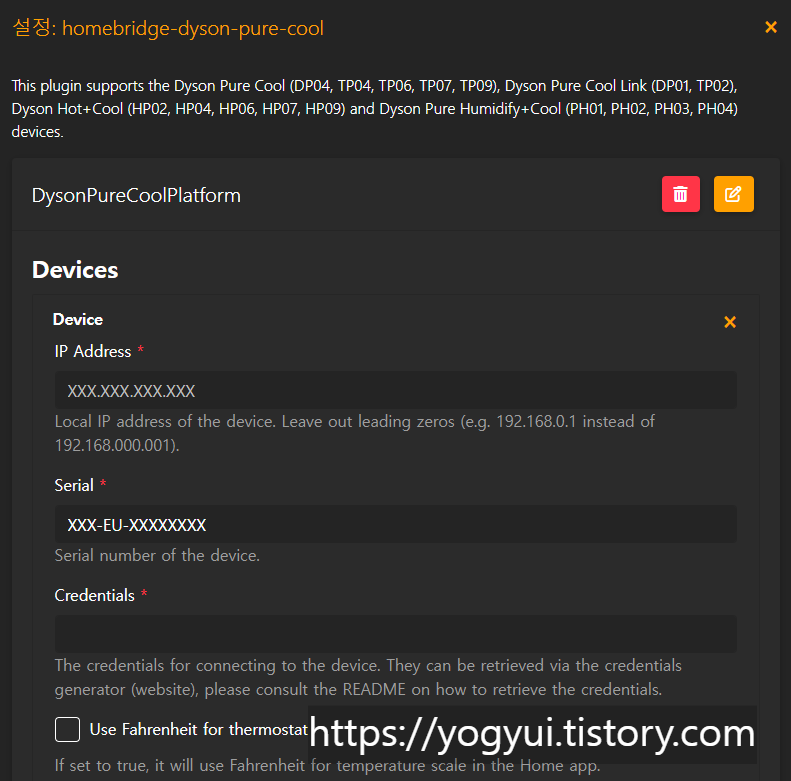
2. Credentials 획득
최초로 디바이스 설정 시, IP주소랑 시리얼번호는 입력하지 않고 우선 Credential(증명서)를 획득해야 한다
Homebridge Config 에디터에 다음과 같이 입력한 후 Homebridge를 재시작해주자
(credential 생성 포트를 48000번으로 설정)
{
    "platforms": [
        {
            "platform": "DysonPureCoolPlatform",
            "devices": [],
            "updateInterval": 60000,
            "credentialsGeneratorPort": 48000
        }
    ]
}
그리고 Homebridge가 실행되고 있는 서버의 48000 포트로 접속한다
※ 서버 외부에서 접속 시 포트포워딩 및 방화벽 설정이 필요할 수 있음
나는 Homebridge가 라즈베리파이에서 구동되고 있기에, 라즈베리파이에서 Chromium으로 바로 접속했다(127.0.0.1:48000)
2.1. 이메일 계정 제출
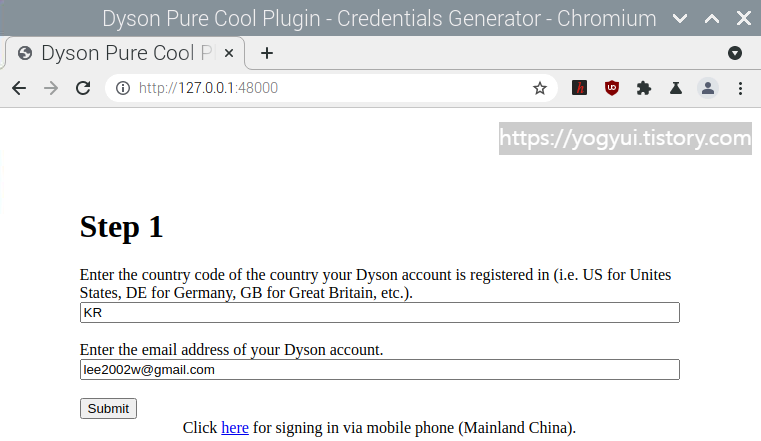
국가코드와 Dyson 계정 이메일 주소를 입력한다
대한민국의 국가코드는 'KR'이다
입력완료 후 Submit 버튼 클릭
2.2. 인증코드 입력
입력한 이메일로 인증코드(6자리) 메일이 수신된다
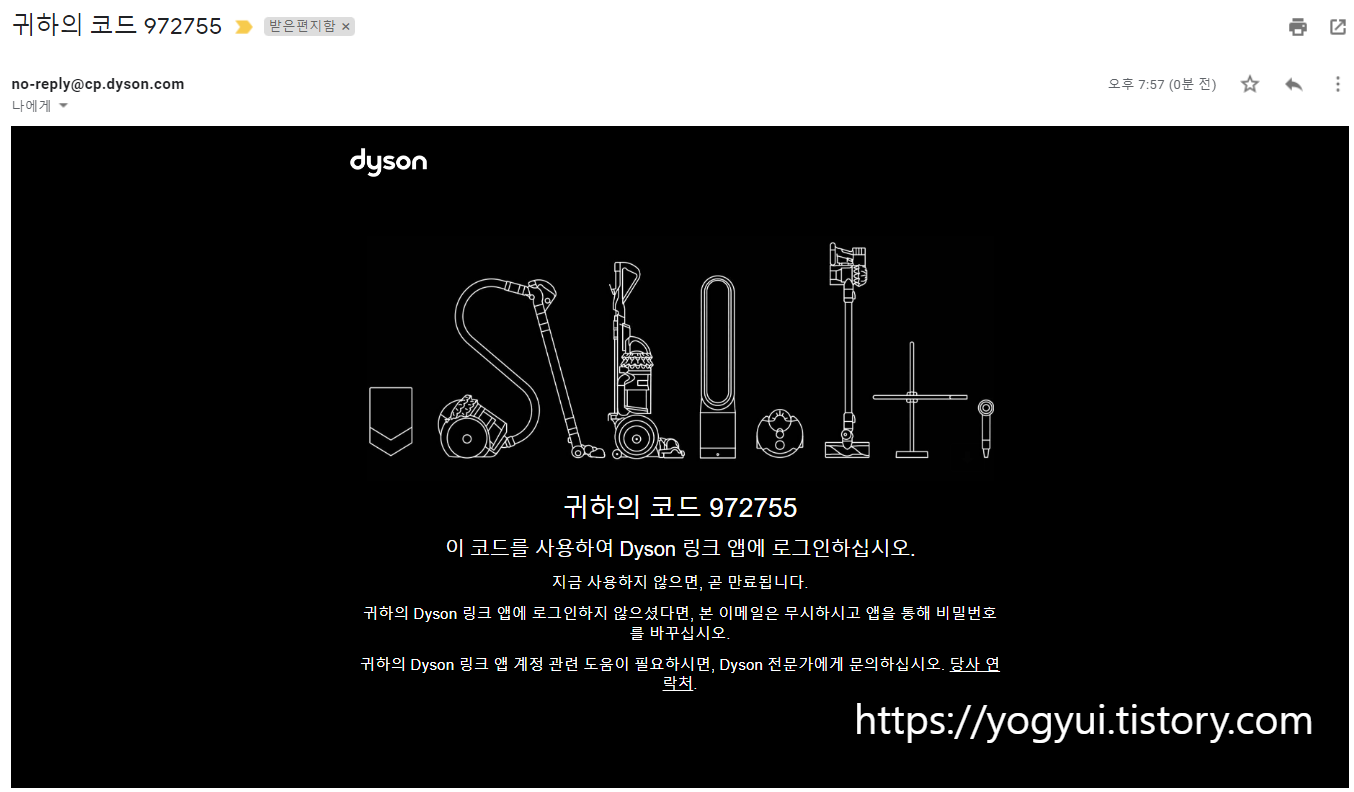
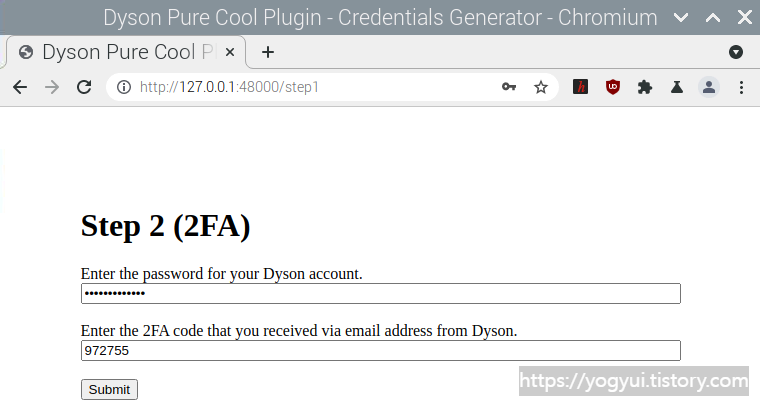
Dyson 계정의 비밀번호와 함께 인증코드 6자리를 입력하고 Submit 버튼을 클릭
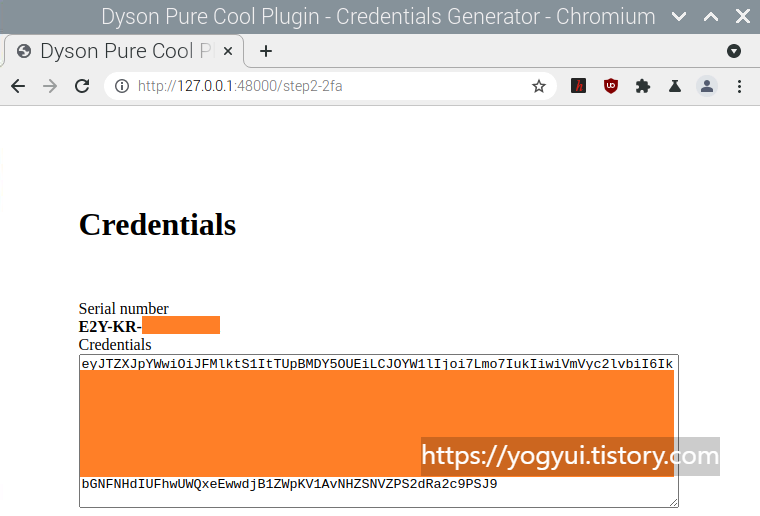
2.3. Credential 코드 획득
내가 등록한 기기의 시리얼 번호와 Credential 문자열을 확인할 수 있다
Credential 전체 코드를 메모장에 복사-붙여넣기해두자
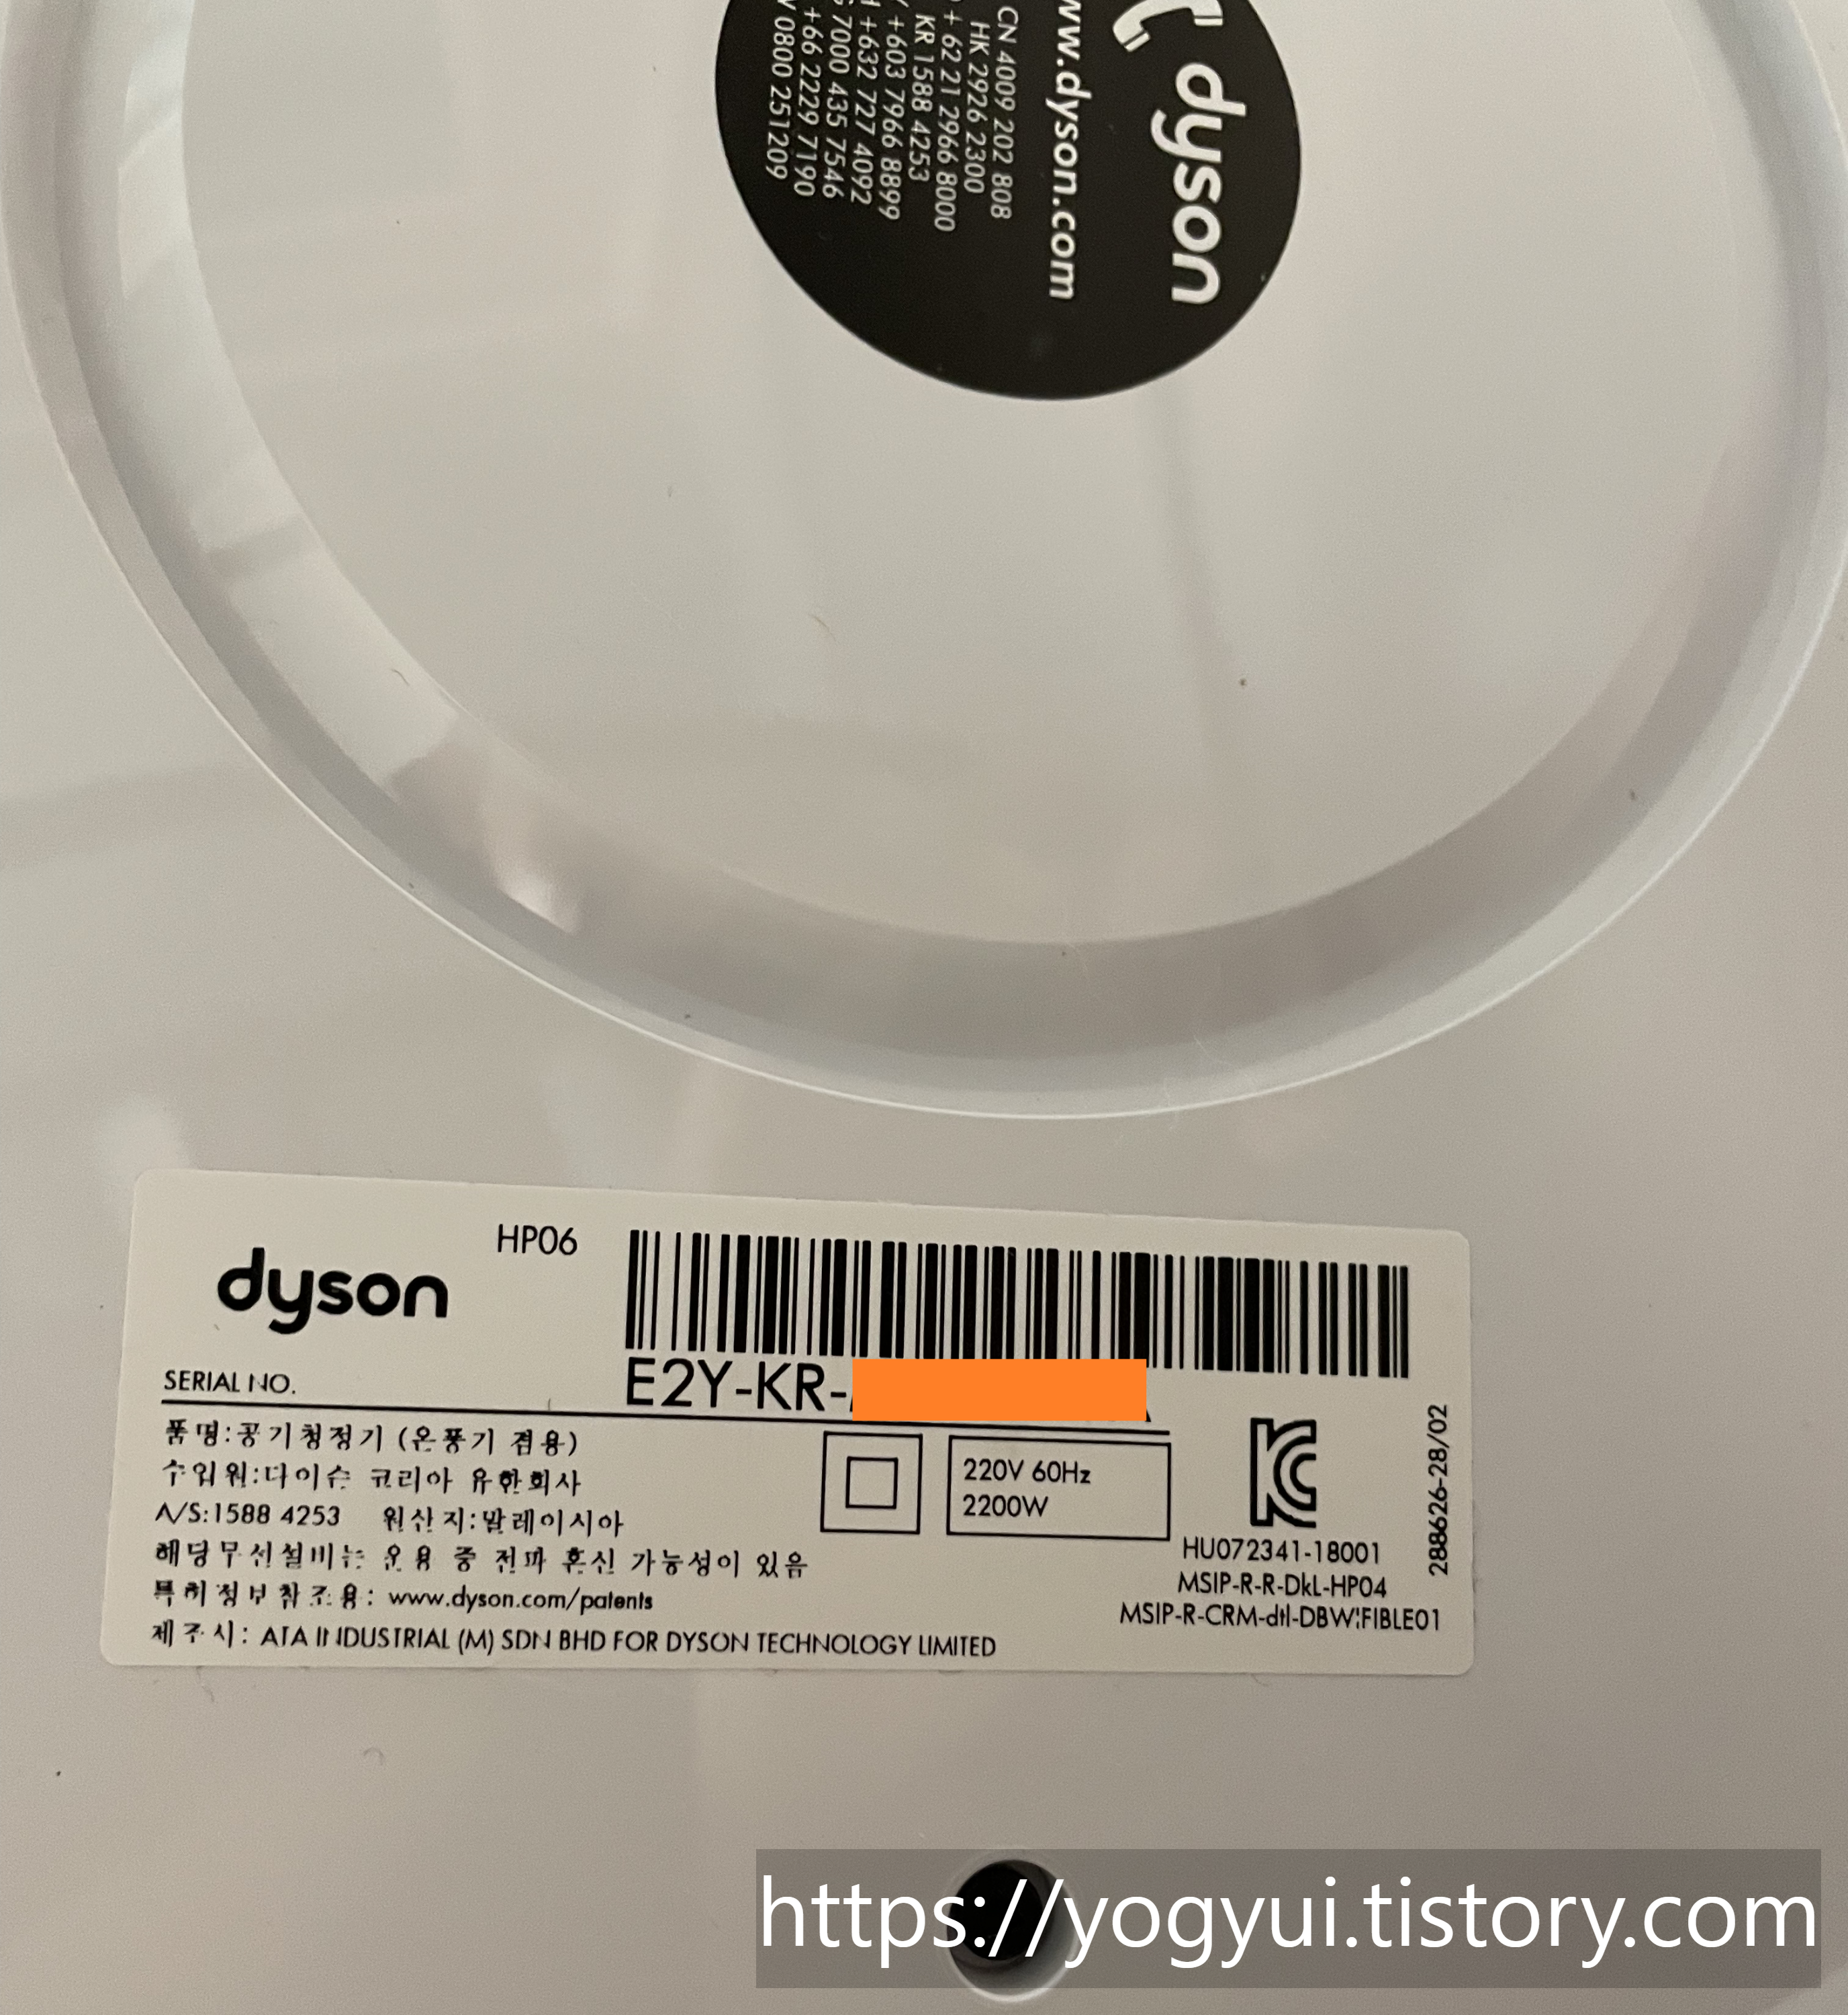
※시리얼번호는 제품 하단 스티커에서도 확인할 수 있다
3. Homebridge Config 파일 수정
credential 문자열을 얻은 후 다음과 같이 Homebridge 액세서리 스크립트를 수정해주자
※ "devices" 키에 딕셔너리를 하나 추가하는 과정
{
"platform": "DysonPureCoolPlatform",
"devices": [
{
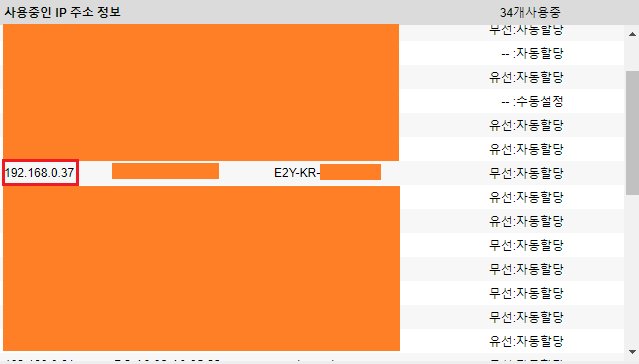
"ipAddress": "192.168.0.37",
"serialNumber": "E2Y-KR-XXXXXXXX",
"credentials": "2.1~2.3 과정을 통해 얻은 문자열",
"useFahrenheit": false,
"enableAutoModeWhenActivating": false,
"enableOscillationWhenActivating": false,
"enableNightModeWhenActivating": false,
"isNightModeEnabled": false,
"isJetFocusEnabled": false,
"isContinuousMonitoringEnabled": false,
"isTemperatureSensorEnabled": false,
"isTemperatureIgnored": false,
"temperatureOffset": 0,
"isHumiditySensorEnabled": true,
"isHumidityIgnored": false,
"humidityOffset": 0,
"isAirQualitySensorEnabled": true,
"isAirQualityIgnored": false,
"isSingleAccessoryModeEnabled": true,
"isFullRangeHumidity": false,
"isHeatingDisabled": false,
"isHeatingSafetyIgnored": false
}
],
"updateInterval": 60000,
"credentialsGeneratorPort": 48000
}'ipAddress'의 IP주소는 자신의 공유기를 통해 확인하도록 하자 (다이슨 앱에서 확인불가 ㅠ)
옵션 키에 대한 설명은 다음과 같다 (플러그인 깃허브 README 발췌)
- useFahrenheit: If set to true, it will use Fahrenheit for temperature scale in the Home app.
- enableAutoModeWhenActivating: If set to true, the Auto mode is enabled when you activate the device in the Home app. Defaults to false.
- enableOscillationWhenActivating: If set to true, oscillation is enabled when you activate the device. Defaults to false.
- enableNightModeWhenActivating: If set to true, night mode is enabled when you activate the device. Defaults to false.
- isNightModeEnabled: If set to true, a switch is exposed for the night mode. Defaults to false.
- isJetFocusEnabled: If set to true, a switch is exposed for the jet focus. DP01, TP02 and HP02 are not supported. Defaults to false.
- isContinuousMonitoringEnabled: If set to true, a switch is exposed for the continuous monitoring. Defaults to false.
- isTemperatureSensorEnabled: If set to true, a separate temperature sensor is exposed. Only used for non-heating devices. If set to false, the temperature is added as characteristic to the air purifier (does not show up in the Apple Home app). Defaults to false.
- isTemperatureIgnored: If set to true, the temperature measurement is completely ignored and not exposed. Can only used for non-heating devices. Defaults to false.
- temperatureOffset: Negatively or positively offset the value reported by the temperature sensor before exposing it to HomeKit. Provide the value in degree Celsius.
- isHumiditySensorEnabled: If set to true, a separate humidity sensor is exposed. If set to false, the humidity is added as characteristic to the air purifier (supported in the Apple Home app). Defaults to false.
- isHumidityIgnored: If set to true, the humidity measurement is completely ignored and not exposed. Can only used for non-humidifier devices. Defaults to false.
- humidityOffset: Negatively or positively offset the value reported by the humidity sensor before exposing it to HomeKit. Provide the value in degree Celsius.
- isAirQualitySensorEnabled: If set to true, a separate air quality sensor is exposed. If set to false, the air quality is added as characteristic to the air purifier (supported in the Apple Home app). Defaults to false.
- isAirQualityIgnored: If set to true, the air quality measurements are completely ignored and not exposed. Defaults to false.
- isSingleSensorAccessoryModeEnabled: If set to true, all sensors are exposed to HomeKit in a single accessory instead of multiple accessories. Only has an effect if the previous settings for enabling sensors are set to true. Defaults to false.
- isSingleAccessoryModeEnabled: If set to true, all services are exposed to HomeKit in a single accessory instead of multiple accessories. If set to true, the single sensor accessory mode has no effect. Use this mode if you are using a third-party HomeKit app and want all services grouped into a single accessory. Defaults to false.
- isFullRangeHumidity: Only for PH01/PH02/PH03/PH04. If set to true, the range of the target humidity control will be from 0% to 100% instead of translating it to the allowed range (30% to 70%) of the Dyson. Defaults to false.
- isHeatingDisabled: Only for HP02/HP04/HP06/HP07/HP09. If set to true, the heating controls are not exposed to HomeKit. Defaults to false.
- isHeatingSafetyIgnored: Only for HP02/HP04/HP06/HP07/HP09. If set to true, this overrides the default safety feature to allow heat to be turned on along with the fan if the fan was heating when last turned off. By default, the heat is disabled when turning on the fan in the Dyson app.
위 항목 내용들은 Dyson 기기를 한번이라도 직접 다뤄봤으면 뭔지 쉽게 감이 올 것 같아 자세한 내용은 생략하도록 한다 (번역하기 귀찮긔)
스크립트 작성이 완료되었으면 Homebridge를 재시작해준다
4. 액세서리 확인
Homebridge 액세서리 창에서 새로 추가된 아이템 확인
(온도, 습도, 공기질 센서가 따로 추가된 것을 알 수 있다)
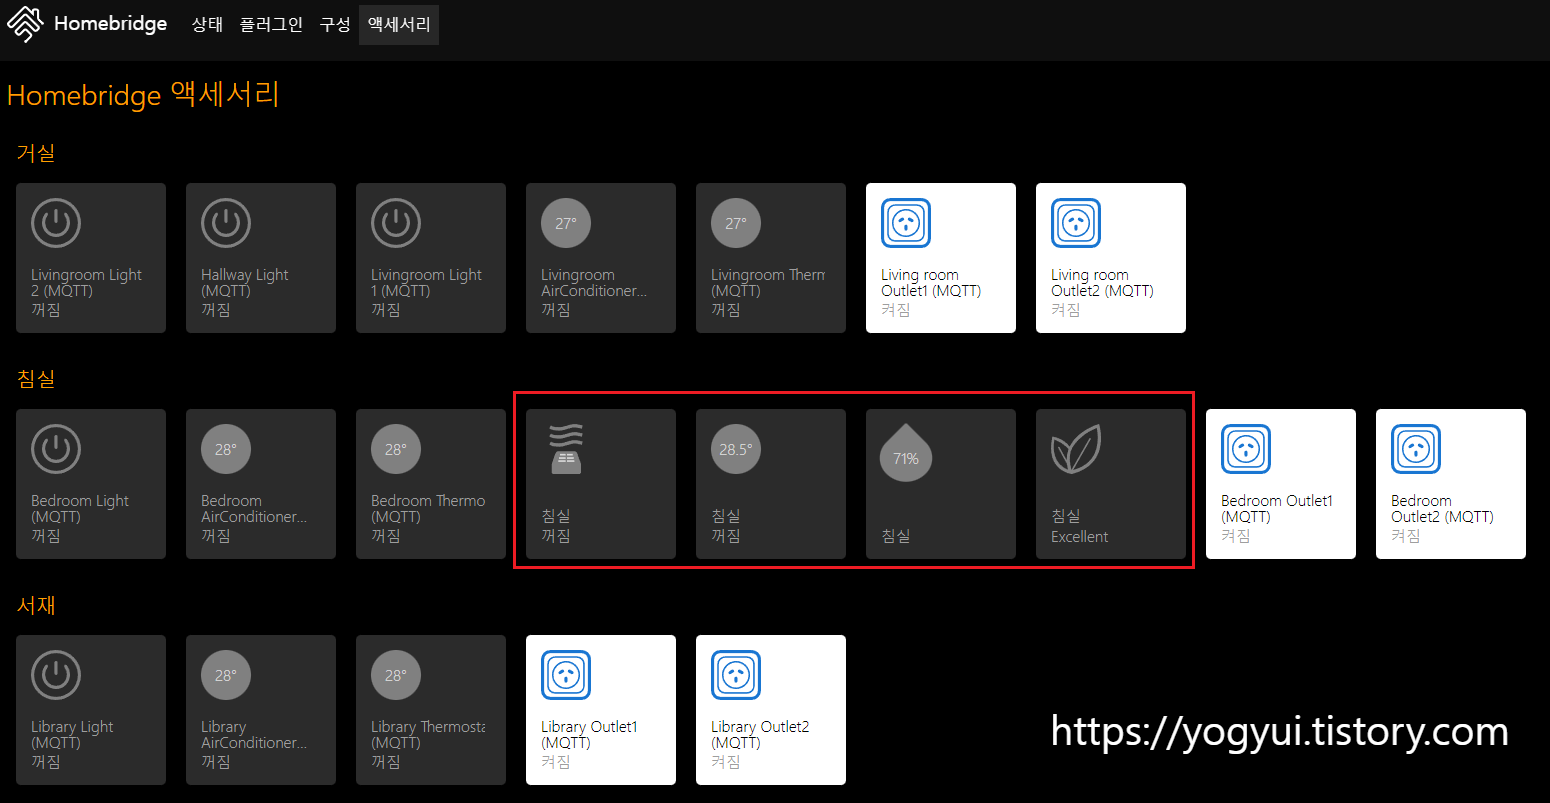
공짜로(?) 온습도 및 공기질 센서가 생긴 기분이라 뿌듯하다(??)
각 아이템의 설정창을 눌러보면
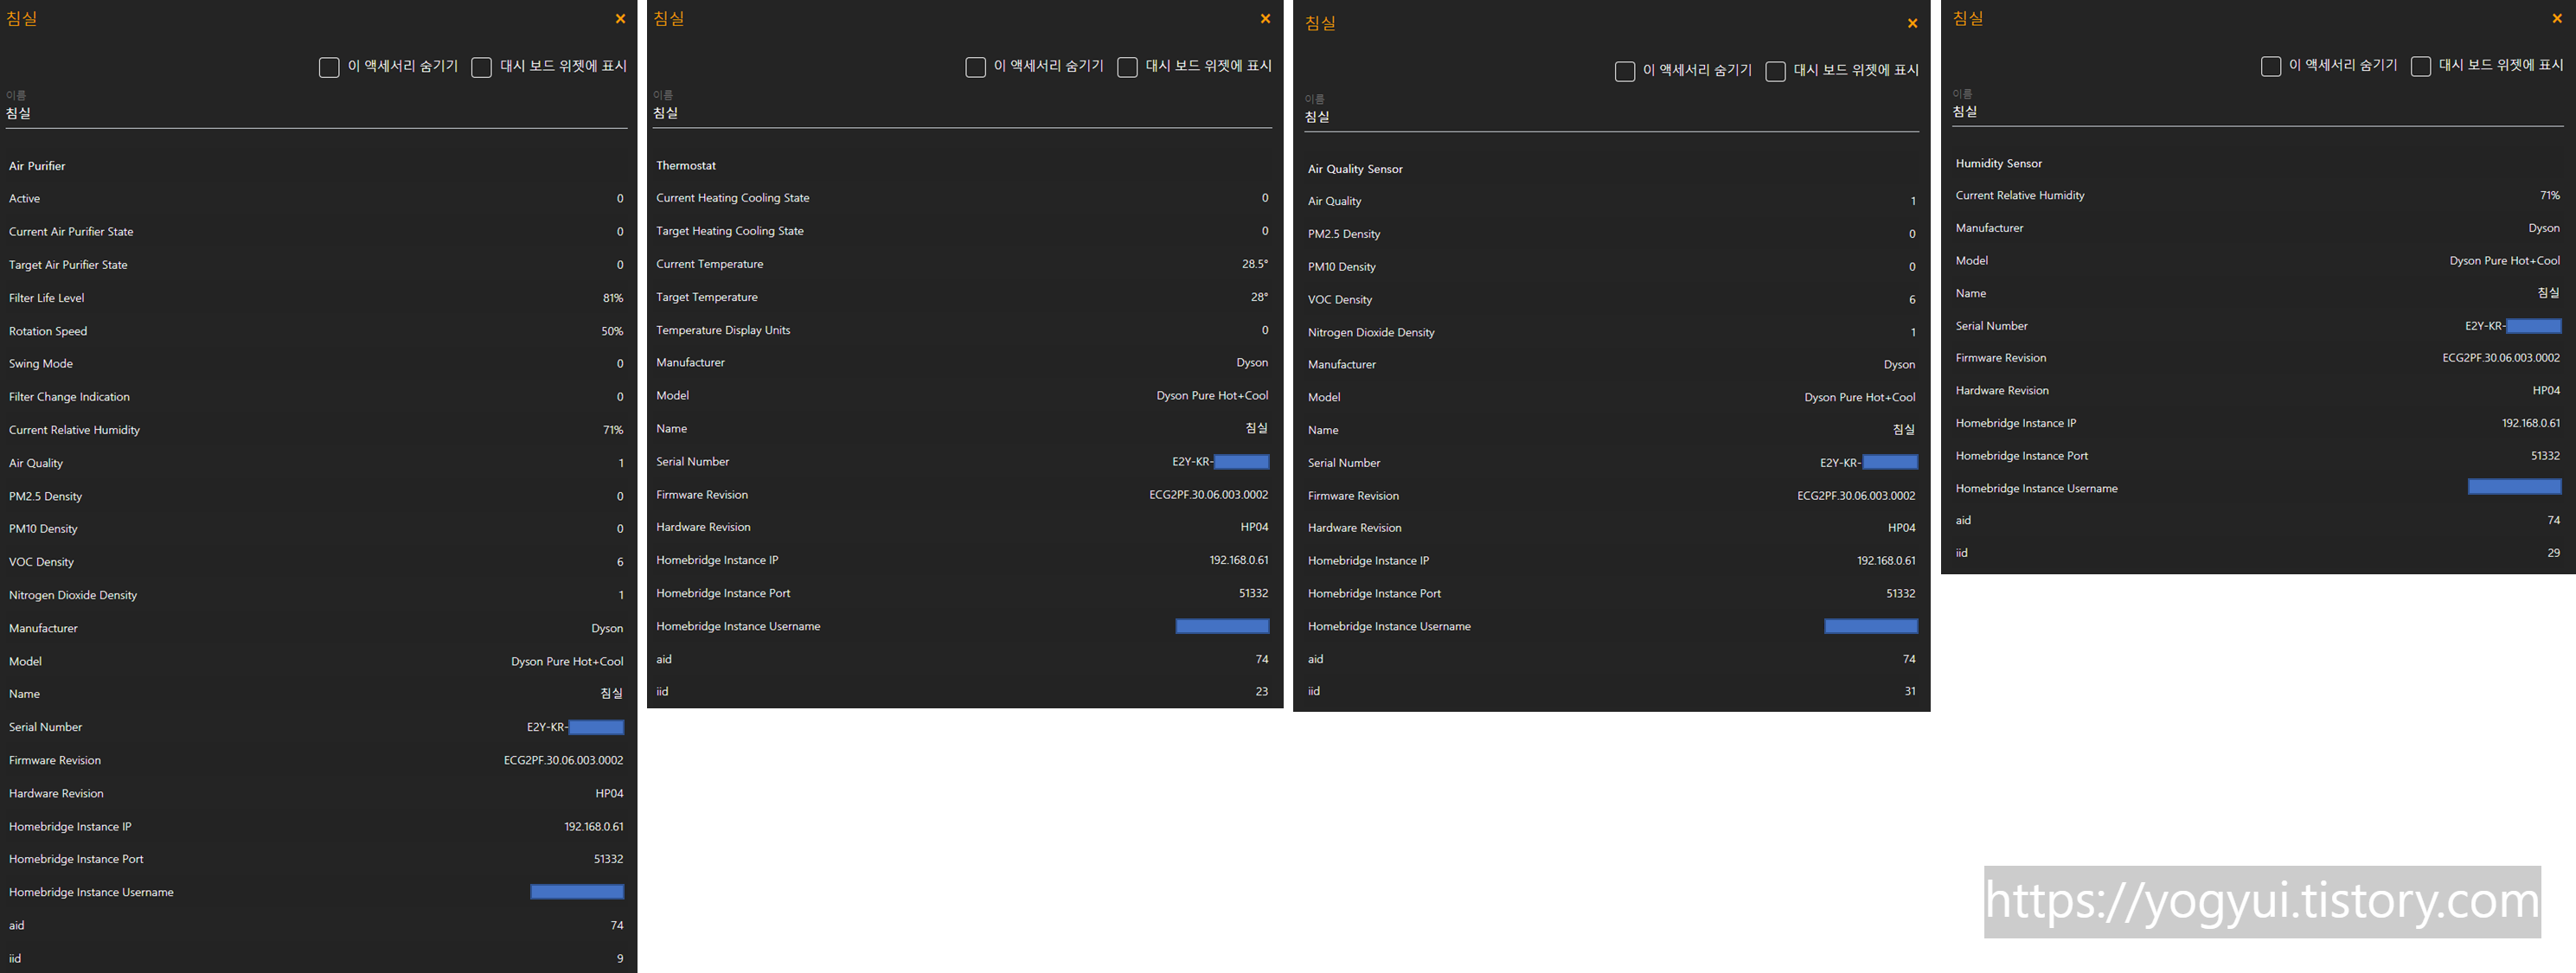
현재 온도 및 상대습도, 공기질 (PM2.5, PM10, VOC, NO2) 뿐만 아니라 필터의 남은 수명도 알 수 있다
(희한하게도 제품군이 HP04로 기재되어 있다.. 뭐지? ㅋㅋ)
5. 애플 기기에서 제어 테스트
애플 홈 앱에서 액세서리를 확인할 수 있다
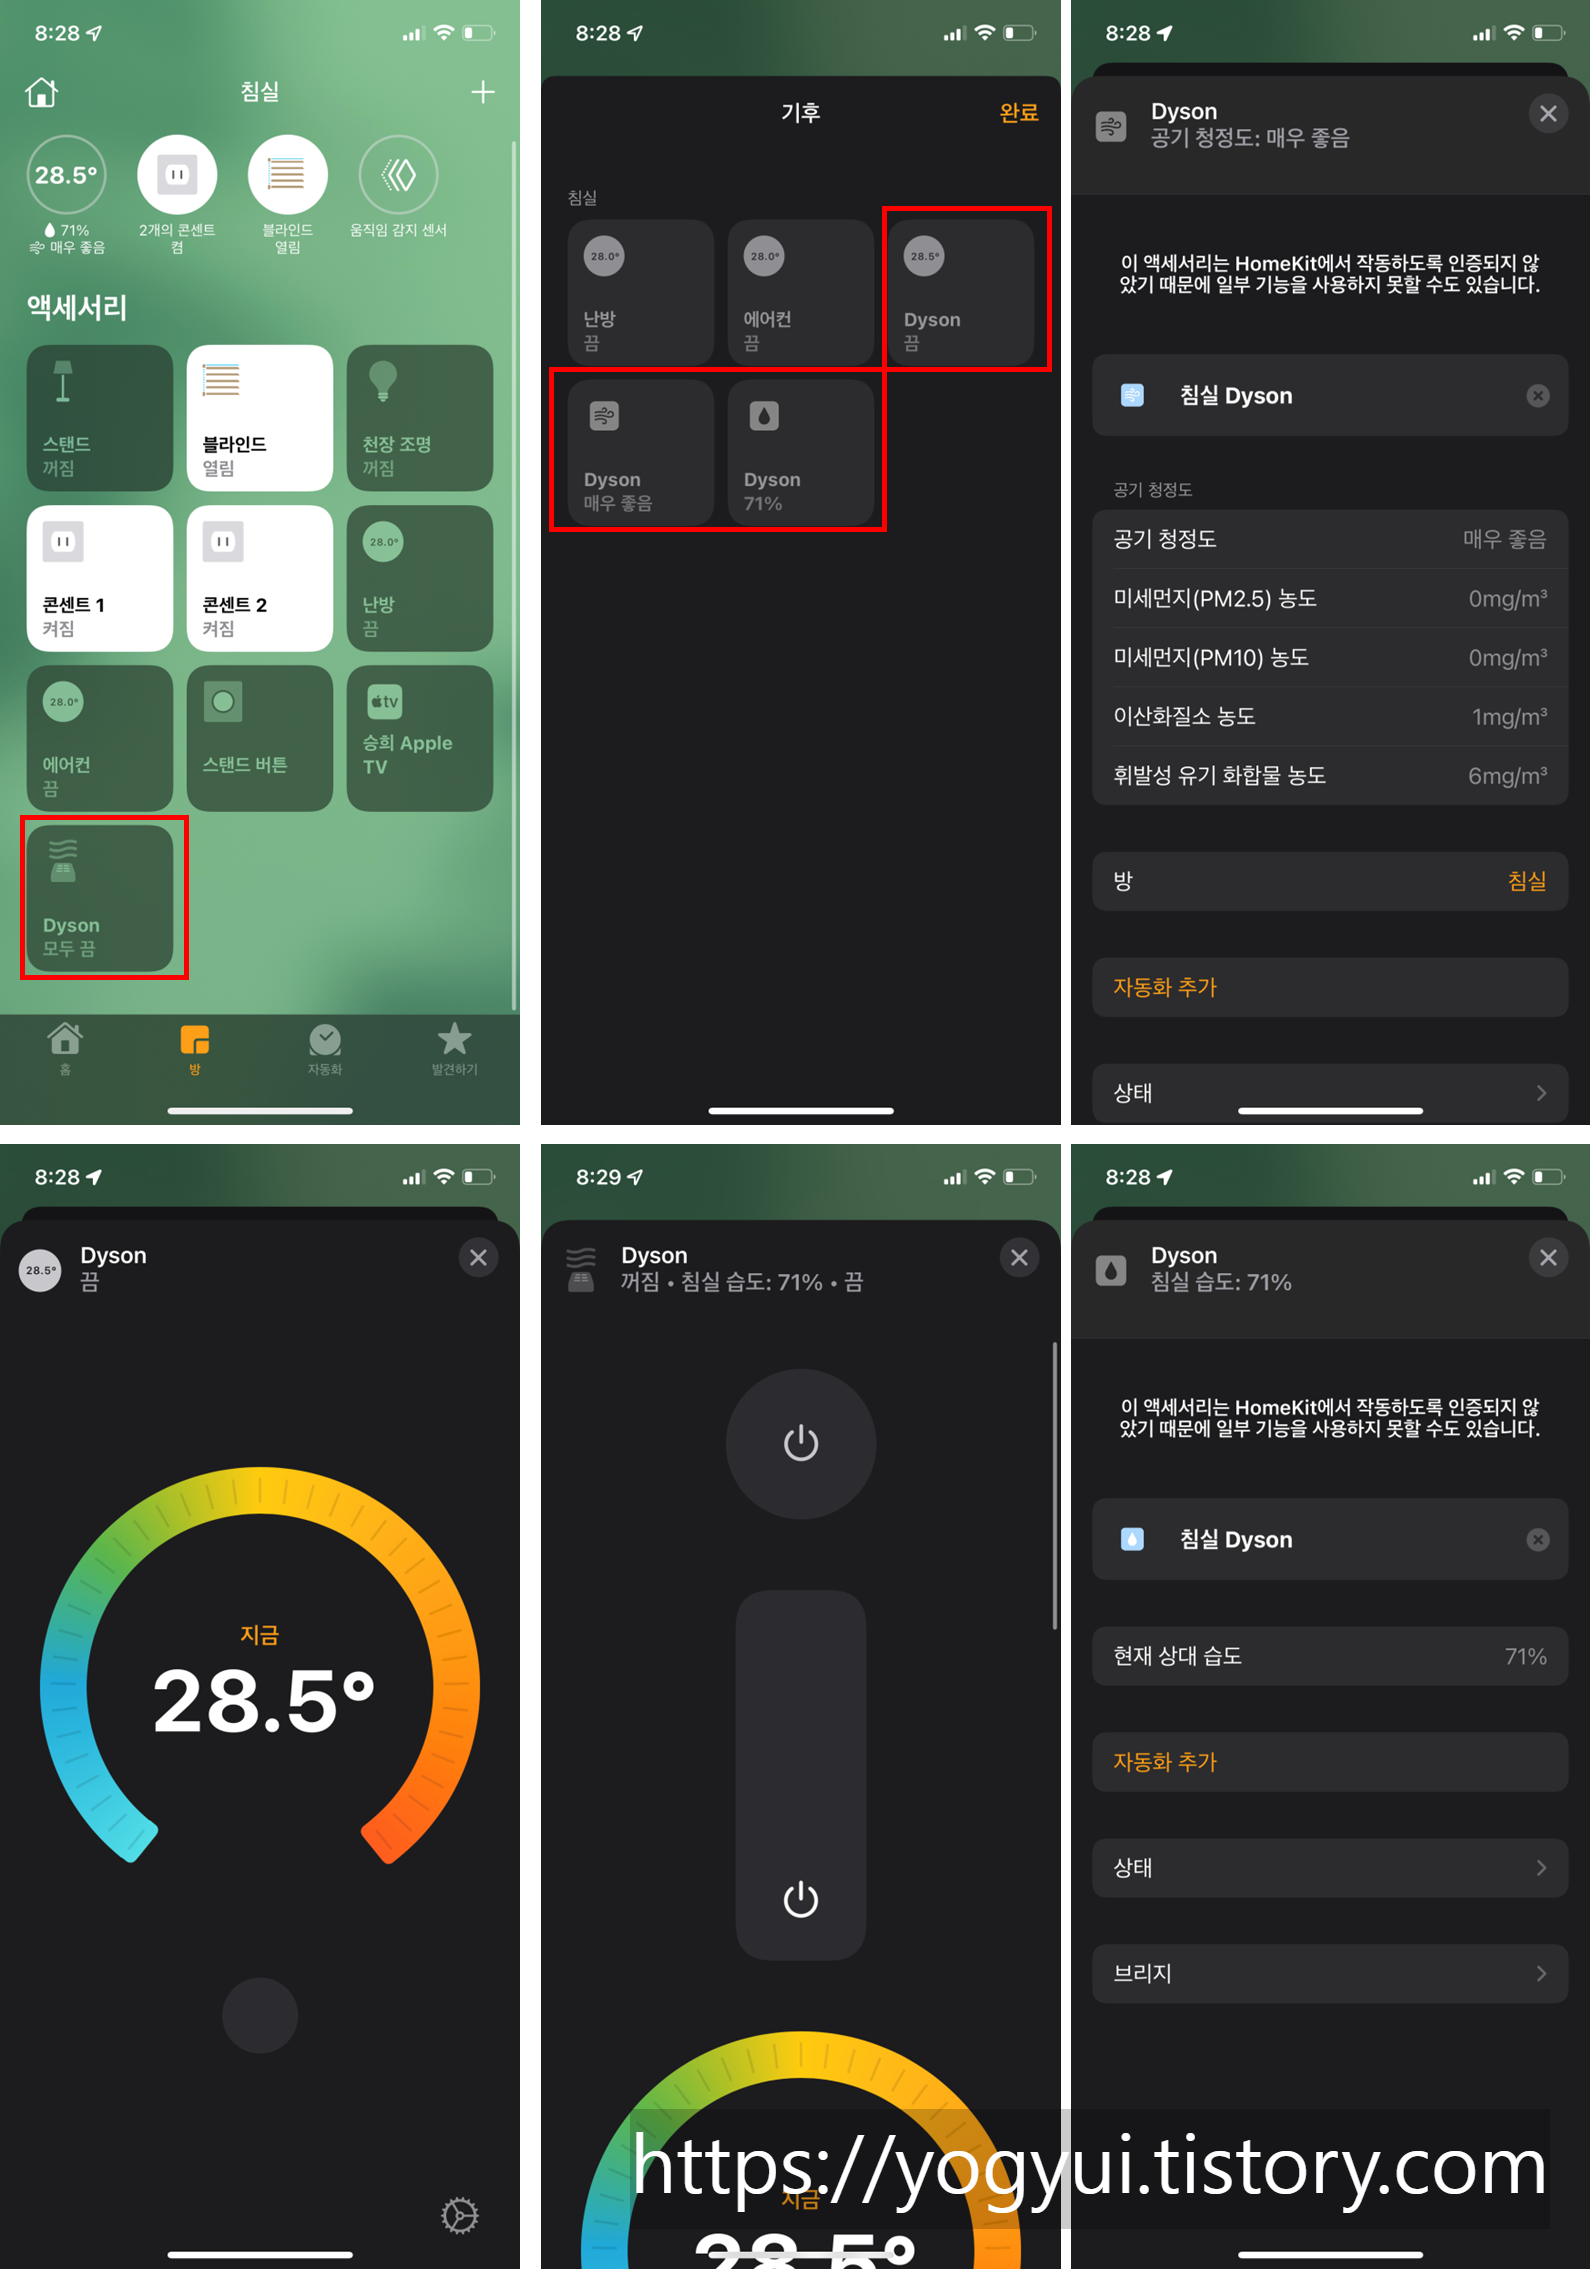
전원 On/Off, 풍량 설정, 온풍기 모드 설정 및 목표 온도 설정, 현재 온도 확인, 현재 습도 확인, 현재 공기질(PM2.5, PM10, 이산화질소, VOC 농도) 확인 등 기기에서 제어할 수 있는 모든 항목을 홈 앱을 통해 접근할 수 있다
상당히 잘 만든 플러그인이다 ㄷㄷ
제어 반응 속도가 실시간에 가깝게 빠르게 반응한다!
(이건 dyson 앱에서도 거의 동일한 반응 속도~ 다이슨 얘네 물건 참 잘 만든단 말이지)
동영상을 보면 꺼진 상태에서 바로 온풍기 모드로 진입할 수는 없다만... 그다지 아쉽지는 않은 결점이랄까?
기존 dyson 앱을 통해서도 충분히 편하게 원격제어를 하고 있었는데, IoT 제어 플랫폼은 하나로 통일하는게 사용하기 편리하기 때문에 왠만한 기기들은 전부 Homebridge랑 연동시키고 있다 (애플워치 - Siri 한번 맛보면 못빠져나온다)
dyson도 별도의 플러그인으로 연동할 수 있다기에 도전해봤고, 5분도 걸리지 않아 연동에 성공할 정도로 상당히 쉽다 (플러그인 자체를 잘 만들었다)
이제 선풍기를 새로 사더라도 dyson 제품으로 사야겠다 ㅎㅎ (발뮤다 탈덕도 좀 할겸...)
'홈네트워크(IoT) > 일반' 카테고리의 다른 글
| Let's Encrypt로 발급받은 SSL 인증서 유효기간 확인 (0) | 2022.08.24 |
|---|---|
| Let's Encrypt SSL 인증서 갱신(renew) 중 webroot 문제 발생 시 해결 방법 (0) | 2022.08.24 |
| Let's Encrypt로 발급받은 SSL 인증서 갱신하기 (2) | 2022.05.28 |
| ipTime 공유기 시스템에서 SSL 인증서 발급하기 (Let's Encrypt) (0) | 2022.02.20 |
| 라즈베리파이 - Home Assistant 컨테이너 설치하기 (0) | 2022.02.18 |


