
| 일 | 월 | 화 | 수 | 목 | 금 | 토 |
|---|---|---|---|---|---|---|
| 1 | 2 | |||||
| 3 | 4 | 5 | 6 | 7 | 8 | 9 |
| 10 | 11 | 12 | 13 | 14 | 15 | 16 |
| 17 | 18 | 19 | 20 | 21 | 22 | 23 |
| 24 | 25 | 26 | 27 | 28 | 29 | 30 |
- 미국주식
- 파이썬
- Bestin
- Espressif
- 애플
- cluster
- 홈네트워크
- Home Assistant
- 주식
- 공모주
- 엔비디아
- 월패드
- 해외주식
- Python
- RS-485
- homebridge
- ConnectedHomeIP
- 힐스테이트 광교산
- 퀄컴
- 배당
- 국내주식
- 나스닥
- MQTT
- Apple
- esp32
- 라즈베리파이
- raspberry pi
- 매터
- 빅데이터분석기사
- matter
- Today
- Total
YOGYUI
EtherCAT Master 환경 구축 - Ubuntu 22.04 LTS + PREEMPT_RT 커널 패치 본문

Setting EtherCAT Master Environment - Ubuntu 22.04 LTS + PREEMPT_RT Kernel Patch
ROS2에서 EtherCAT 기반 서보모터, IO보드 등을 제어하기 위해 사용할 수 있는 유용한 플러그인 EtherCAT Driver ROS2 Stack는 EtherLab의 IgH EtherCAT Master가 설치된 Ubuntu 22.04 운영체제에서 구동되어야 하는데, EtherCAT의 PDO 주기 통신을 문제없이 구동하기 위해서는 Ubuntu OS의 리눅스 커널을 Real-Time(리얼타임, 실시간) 성능이 보장되도록 환경을 구축해야 한다
※ Xenomi 환경을 구축하는 방법도 있지만, Ubuntu 22는 RT 커널 패치를 손쉽게 구할 수 있어 개인적으로 더 선호한다
지난 포스트(Linux :: Real-Time Ubuntu 22.04 LTS (PREEMPT_RT))에서는 Ubuntu Pro 활성화 후 PREEMPT_RT 커널을 활성화하는 방법에 대해 알아보았는데, 이번 글에서는 Ubuntu Desktop에 사용자가 수동으로 특정 버전의 커널 소스 코드를 가져온 뒤 리얼타임 패치 후 적용하는 방법에 대해 알아보도록 한다
※ 단순히 RT 커널을 활성화하는 걸 넘어서서, 실시간성 보장을 위한 다양한 설정들을 변경할 수 있다
Linux :: Real-Time Ubuntu 22.04 LTS (PREEMPT_RT)
1. Introduction 로봇공학을 전공했거나 실무에 적용하고 있는 개발자라면 적어도 한번쯤은 EtherCAT(이더캣)을 사용해봤을 것이다 서보 모터 드라이버, I/O 보드 등 이더캣 슬레이브(Slave)를 구동하기
yogyui.tistory.com
본 글에서 다룬 지 엣지컴퓨터(Edge Computer) 사양은 아래와 같다
[PC 사양]
제조사: Advantech (어드밴택)
모델명: EI-52-S6A1
CPU: Intel i5-1145G7E 2.60GHz (4 cores)
RAM: 16GB
SSD: 64GB
I/O Interface: 2 Port LAN (Intel i219 GbE, Intel i210 GbE), 2 Port USB2.0, 4 Port USB3.0
(※ LAN 포트 하나는 EtherCAT용으로, 다른 하나는 일반 인터넷용으로 활용하기 위해 2포트 필요)

1. Ubuntu Desktop 22.04 LTS 다운로드 및 설치
Ubuntu 이미지 다운로드 및 시동디스크 생성은 Windows 11에서 진행함
1.1. OS 이미지 다운로드
Ubuntu 공식 사이트에서 운영체제 설치용 이미지 파일(확장자=iso)을 다운로드받는다
글을 작성한 2023년 11월 현재 최신 LTS(Long Term Support, 장기 지원) 버전은 22.04.3이다
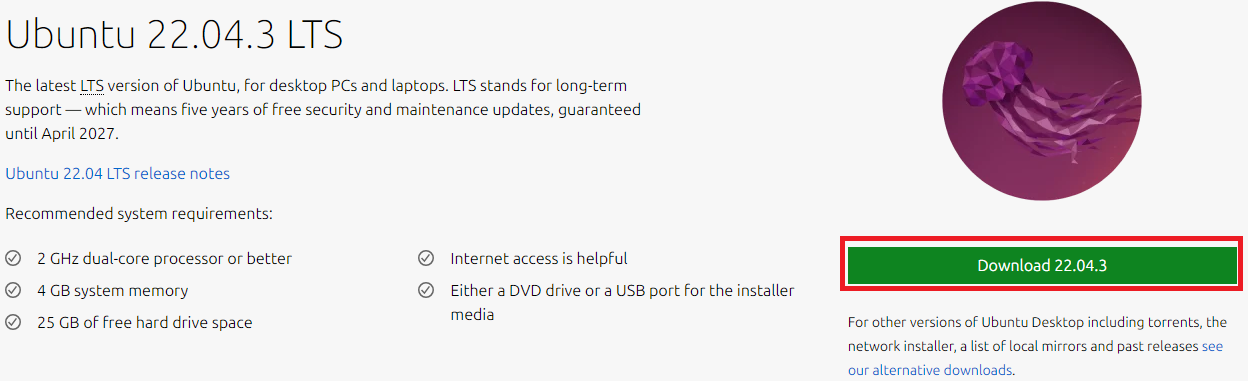
우분투 22.04의 시스템 권장사양은 다음과 같으니 설치하고자 하는 PC의 사양을 확인해보자
- CPU: 2GHz 클럭 듀얼 코어 이상
- Memory: 4GB 이상
- Storage: 25GB 이상 (minimum으로 설치해도 개발환경 꾸미면 10GB는 족히 넘어가니 넉넉하게 64GB 이상 필요)
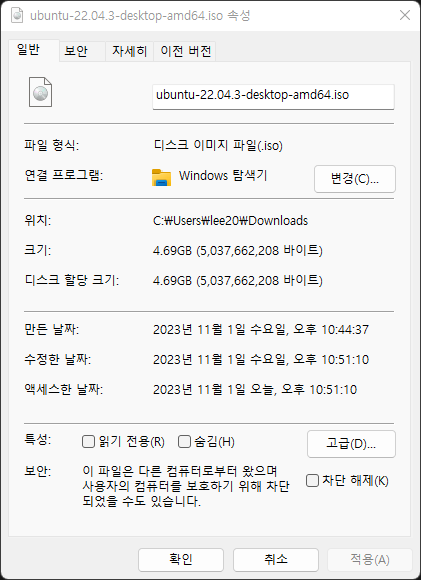
OS 이미지 파일명은 ubuntu-22.04.3-desktop-amd64.iso, 파일 크기는 4.69GB
1.2. 부팅 디스크(USB 플래시 메모리 혹은 외장하드) 생성
ISO 이미지를 부팅 디스크로 만들기 위한 툴로 Rufus를 사용하면 편하다(링크)
※ 중요: USB 플래시 메모리 혹은 외장하드는 8GB 이상 용량이 필요하며, 디스크 생성 시 포맷해야 한다
공식 페이지 '다운로드' 탭에서 '포터블' 버전으로 다운로드받자

※ Mac OS나 Linux라면 Balena Etcher 사용 추천
※ rufus 사용법에 대해서는 본 글에서는 생략하도록 한다
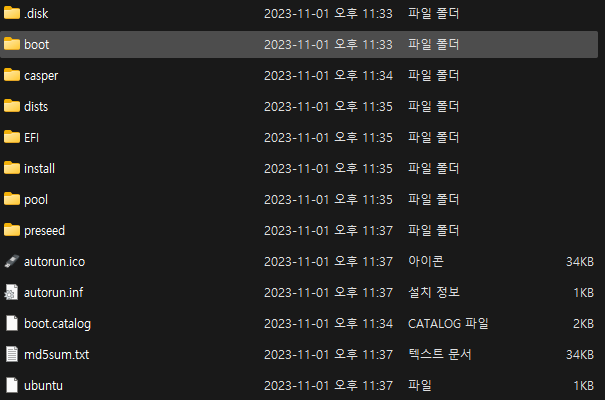
rufus를 통해 USB 플래시 메모리 혹은 외장하드를 Ubuntu 시동 디스크로 만들면 디스크 내부 내용은 다음과 같다
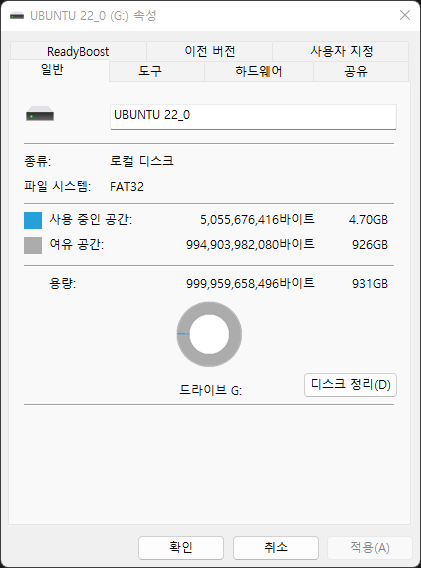
사용중인 공간은 4.70GB로 표시된다
1.3. Ubuntu 설치
여기서부터 모든 작업은 설치된 Ubuntu 환경에서 진행
(대부분의 작업은 터미널에서 진행된다)
본격적으로 우분투를 설치해보자
(부트디스크 선택을 위한 바이오스 설정에 대한 설명은 생략)
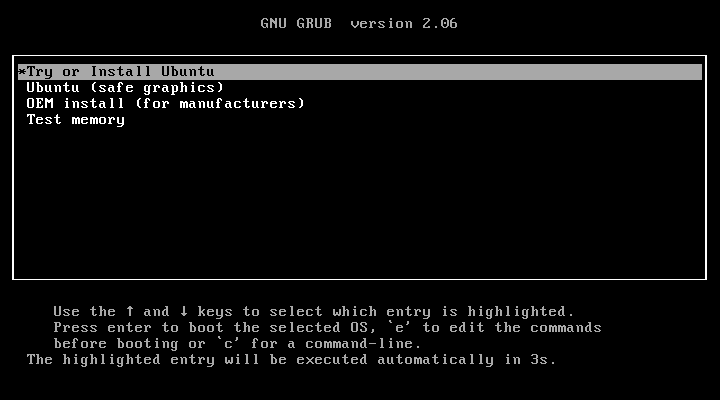
최초 화면에서 'Try or Insall Ubuntu' 선택
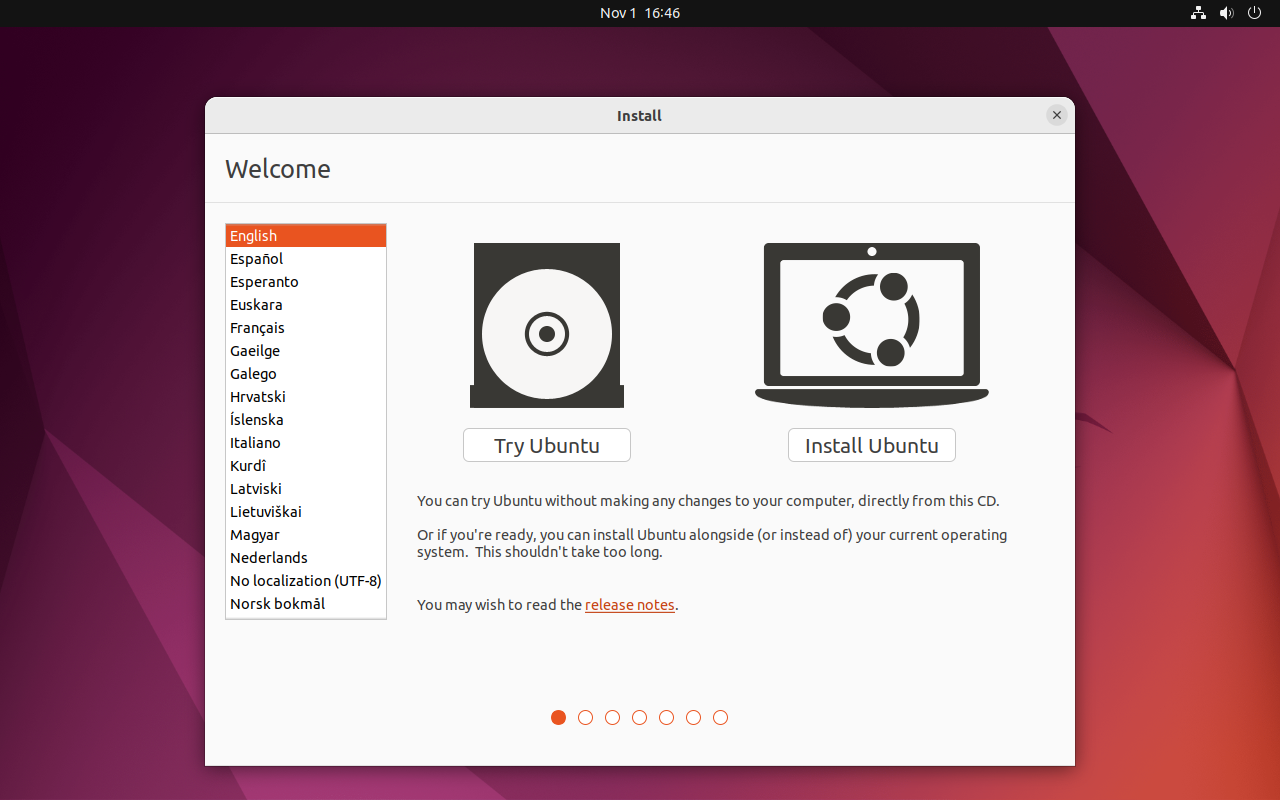
언어는 English 선택 후 'Install Ubuntu' 클릭
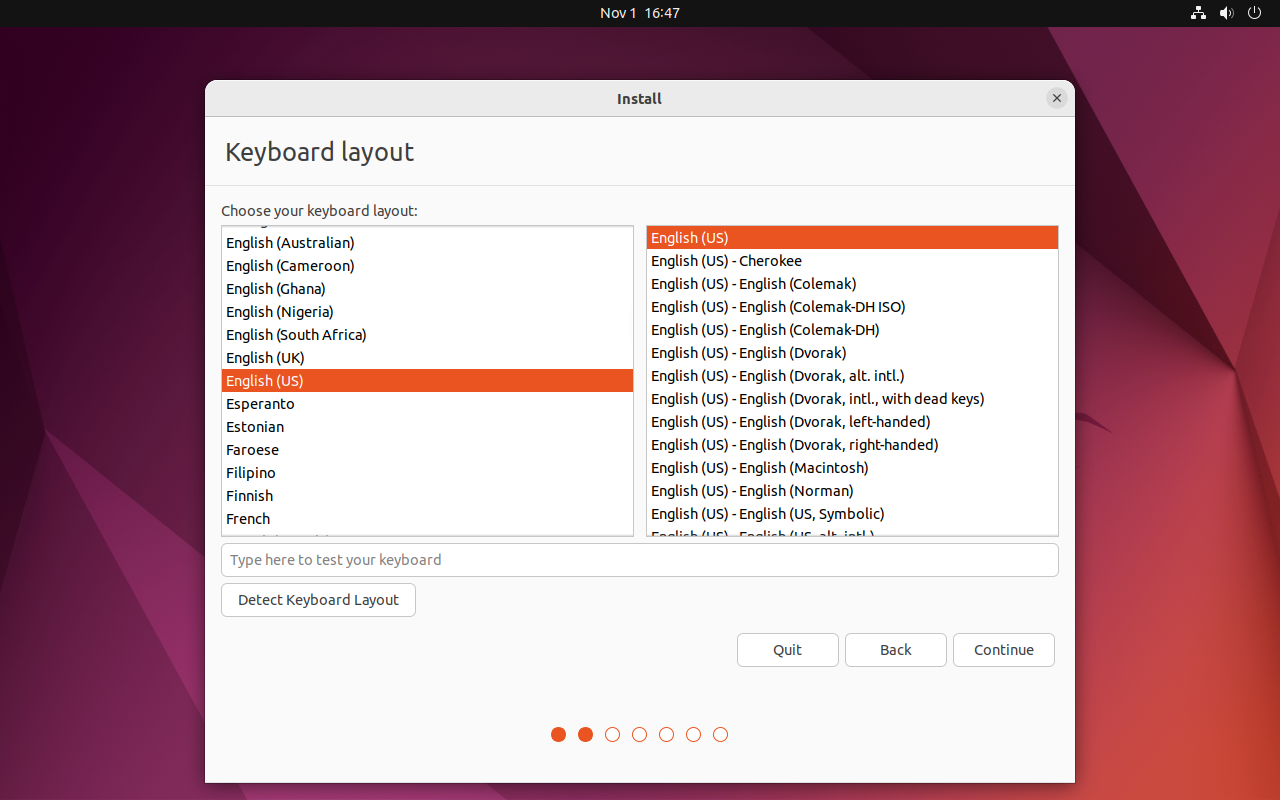
키보드 레이아웃은 둘 다 English(US) 선택 후 Continue 클릭
(OS 설치 완료 후 필요에 따라 한글 키보드 입력기를 따로 설치해주면 된다)
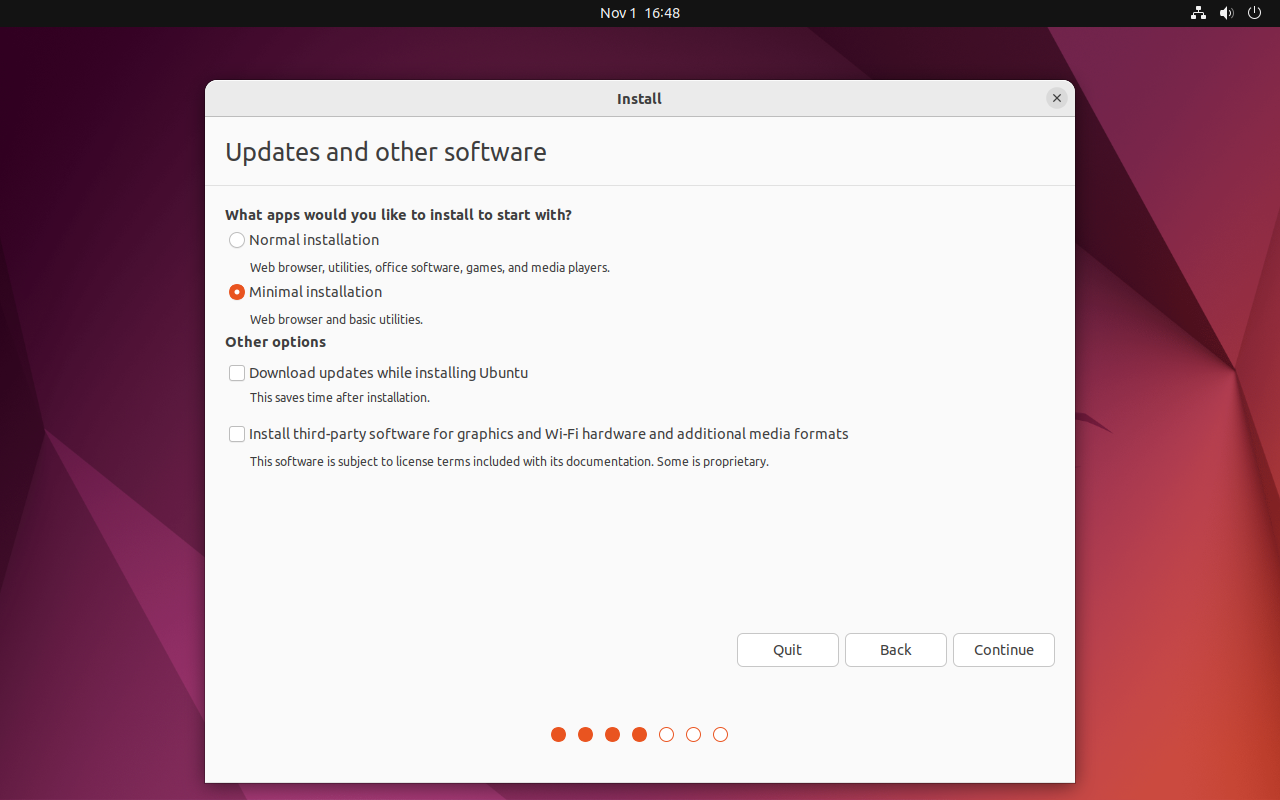
필요없는 소프트웨어 설치를 방지하기 위해 'Minimal installation' 선택 (디스크 용량을 아껴야한다)
그리고 설치 과정에서 업데이트를 할 필요가 없기 때문에 'Download updates while installing Ubuntu' 체크 해제 (어차피 OS 설치 완료 후 apt update 호출해줘야 한다)
PC가 완전 공장초기화된 상태라면 'Erase disk and install Ubuntu' 옵션밖에 선택할 게 없다
(다른 OS가 이미 설치되어 있는 상태라면 다른 옵션들도 선택할 수 있는데, 그냥 포맷하고 새로 까는게 속편하다)
'Install Now'를 클릭하면 설치가 진행된다

디스크 파티션 변경에 대한 경고 문구가 뜨는데, 그냥 'Continue'를 클릭

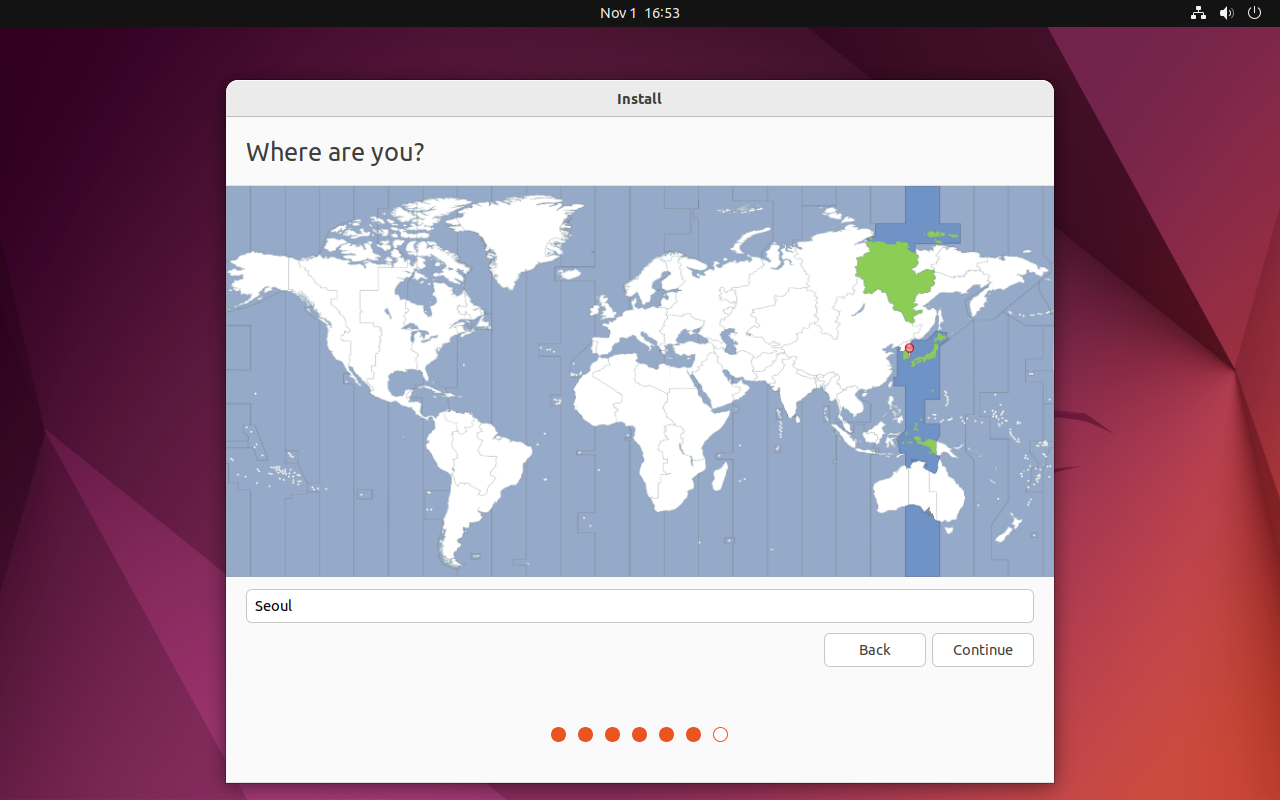
타임존은 PC가 구동중인 지역을 선택 (한국땅이라면 당연히 Seoul, OS 설치 완료 후 변경 가능하다)
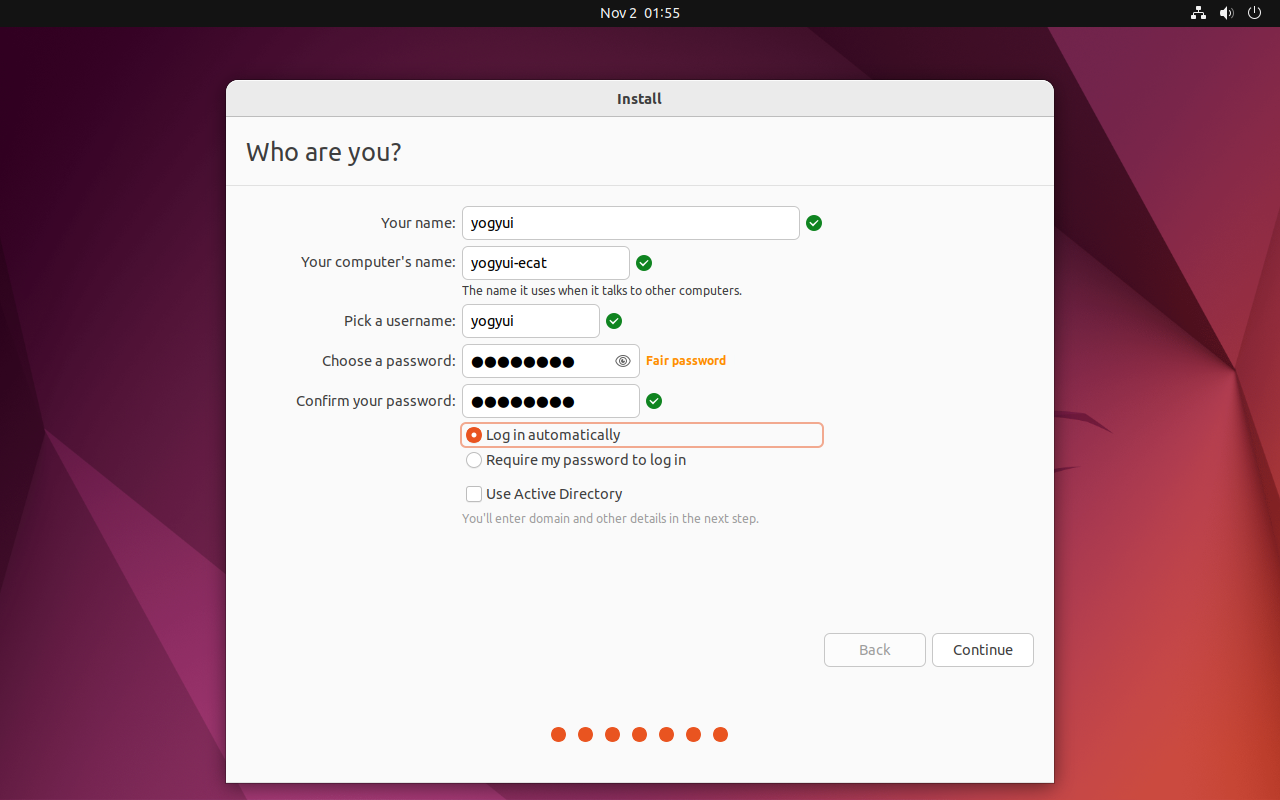
계정 정보 입력 (사용자 이름과 컴퓨터 이름, 비밀번호) 후 'Continue' 클릭
OS 설치에 필요한 파일들이 부팅디스크에서 PC의 스토리지로 복사된다
복사 완료 후 설치가 진행된다 (설치는 10~20분가량 소요된다)
설치 완료 후 'Restart Now'를 클릭해 리부팅해준다 (리부팅하면서 부팅디스크는 제거하면 된다)
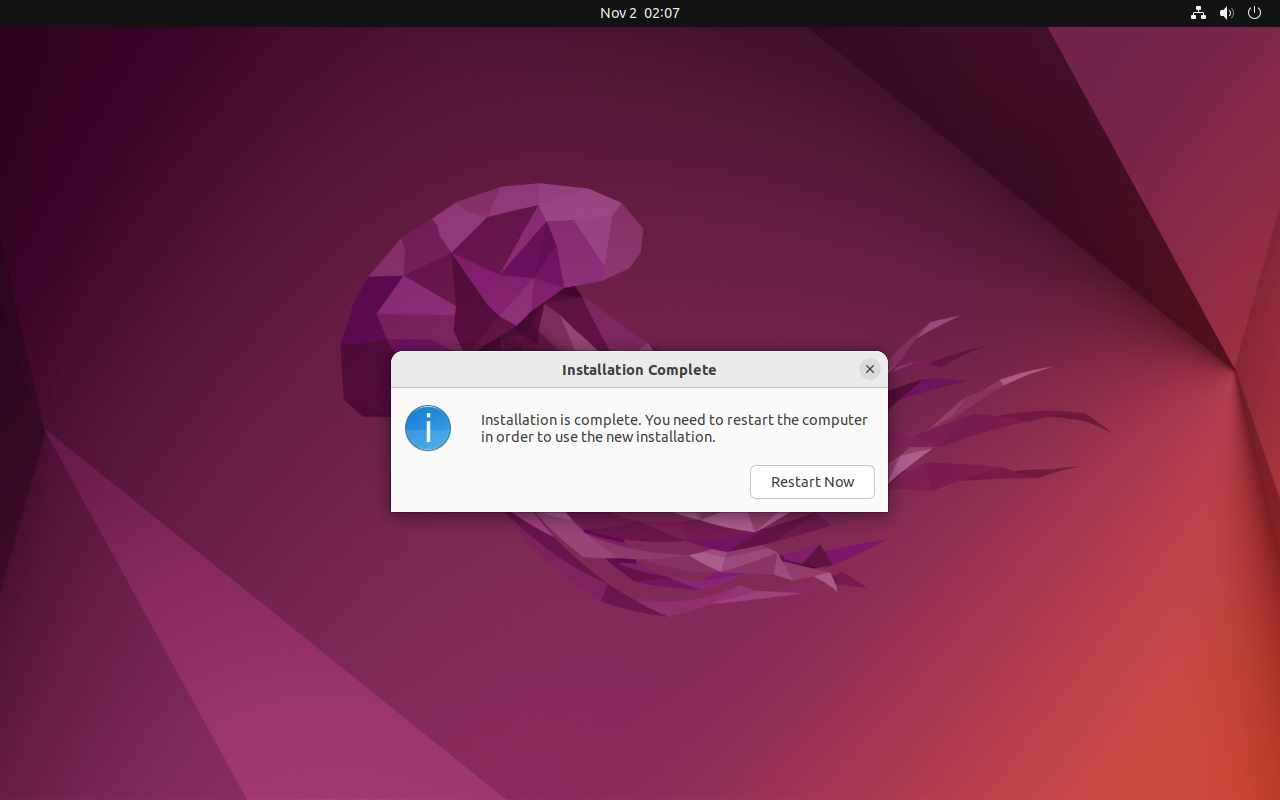
설치 완료!

1.4. 필수 패키지 설치
이 후 진행될 과정 (커널 빌드, IgH EtherCAT Master 빌드 등)을 위해 필요한 패키지들은 apt를 사용해 설치해주자
$ sudo apt-get upgrade
$ sudo apt-get update
$ sudo apt-get install curl openssh-server net-tools make gcc libncurses-dev libssl-dev flex libelf-dev bison build-essential libtool git autoconf automake pkg-config rt-tests doxygen -y
2. RealTime 리눅스 커널 (Linux RT Kernel) 설치
리눅스 커널 소스코드와 PREEMPT_RT 패치는 리눅스 커널 아카이브 (https://mirrors.edge.kernel.org/)에서 다운로드받을 수 있다
2.1. 커널 소스코드 다운로드
커널 소스코드를 다운로드받을 경로를 하나 생성해준다 (경로나 디렉터리 이름은 아무렇게나 지어도 무방)
$ mkdir ~/kernel커널 소스코드 리스트는 다음 주소에서 확인할 수 있다
https://mirrors.edge.kernel.org/pub/linux/kernel/v5.x/
2023년 11월 1일 기준 커널 최신 버전은 5.15.137
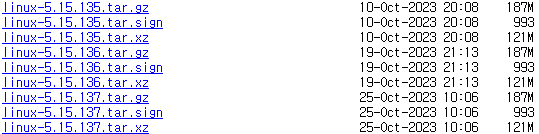
특별한 이유가 없다면 최신버전으로 다운로드받아주자
$ cd ~/kernel
$ wget https://mirrors.edge.kernel.org/pub/linux/kernel/v5.x/linux-5.15.137.tar.gz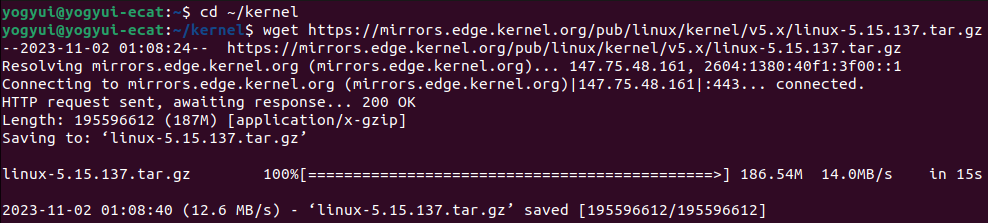
tar 압축파일을 해제 후 압축파일은 제거
$ tar -xzf linux-5.15.137.tar.gz
$ rm linux-5.15.137.tar.gz
압축 해제 결과 linux-5.15.137 디렉터리가 생성되었다

2.2. PREEMPT_RT 커널 패치 적용
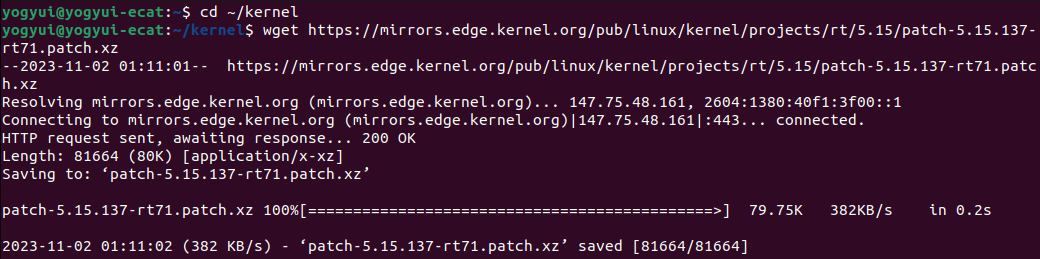
리눅스 커널 5.15 버전에 대한 PREEMPT_RT 패치는 다음 사이트에서 확인할 수 있다
https://mirrors.edge.kernel.org/pub/linux/kernel/projects/rt/5.15/
2023년 11월 1일 기준 PREEMPT_RT 패치 최신버전은 커널 5.15.137-71 버전

$ cd ~/kernel
$ wget https://mirrors.edge.kernel.org/pub/linux/kernel/projects/rt/5.15/patch-5.15.137-rt71.patch.xz
만약 이전 버전의 커널에 대한 패치를 다운로드받아야 한다면 위 링크에서 /older 링크를 들어가서 알맞는 버전을 찾아야 한다
(ex: 5.15.133 커널에 대한 패치파일 URL은 https://mirrors.edge.kernel.org/pub/linux/kernel/projects/rt/5.15/older/patch-5.15.133-rt70.patch.xz)
이제 커널 소스코드에 리얼타임 패치를 적용해주자
(1) 커널 패치 파일 압축 해제
$ cd ~/kernel
$ xz -d patch-5.15.137-rt71.patch.xz
(2) 커널 소스 디렉터리 경로(linux-5.15.137)로 진입 후 patch 명령어를 호출해 리얼타임 커널 패치
$ cd linux-5.15.137
$ patch -p1 < ../patch-5.15.137-rt71.patch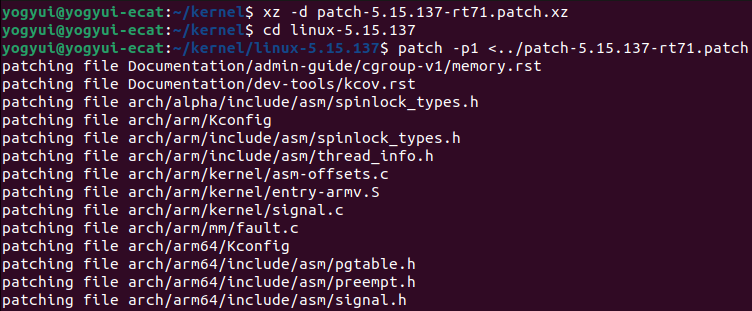
2.3. menuconfig 설정
Ubuntu Desktop 설치 후 부팅 시 사용된 커널의 config 파일을 복사해온다
$ uname -r
2023년 11월 기준 최신 커널 버전은 6.2.0 버전이 디폴트로 설치된다
Real-Time 커널 패치는 아직은 5.15.xxx 버전까지만 지원하고 있는지라 커널 다운그레이드가 불가피하다
어차피 EtherCAT 구동에 지장은 없다
$ cd ~/kernel/linux-5.15.137
$ cp /boot/config-6.2.0-36-generic .config
config 파일 복사 후 커널 설정 UI를 열어준다
$ make menuconfig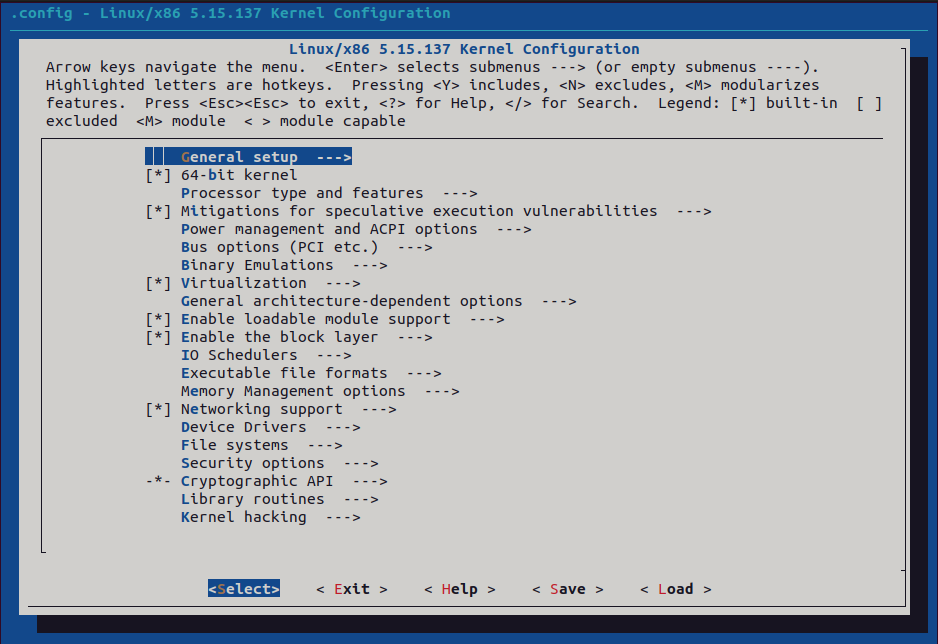
리얼타임 환경 구축을 위해서는 이것저것 설정해야 할 게 많은데, 이 글에서는 개인적으로 리얼타임 환경 구축 시 꼭 필요하다고 생각하는 옵션들만 다루도록 한다
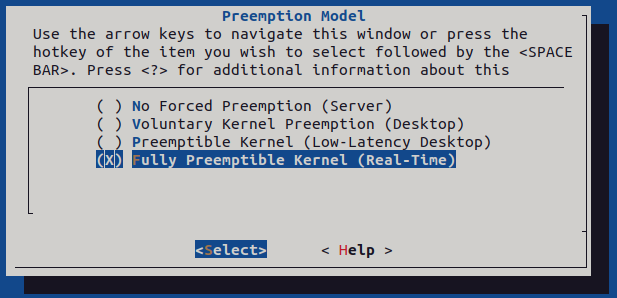
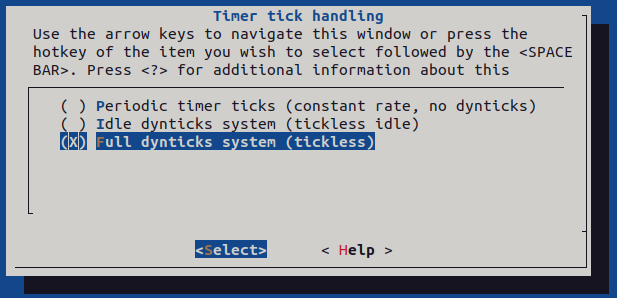
2.3.1. General Setup
Preemption Model > Fully Preemptible Kernel (Real-Time) 선택
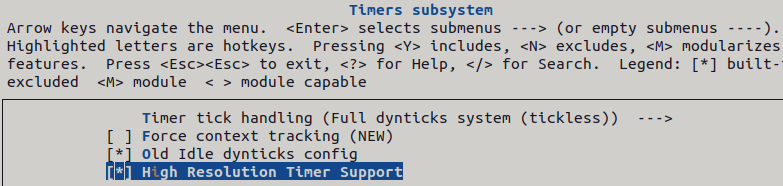
Timers subsystem > Timer tick handling > Full dynticks system (tickless) 선택
Timers subsystem > High Resolution Timer Support > 활성화
2.3.2. Processor type and feature
Linux guest support > 비활성화

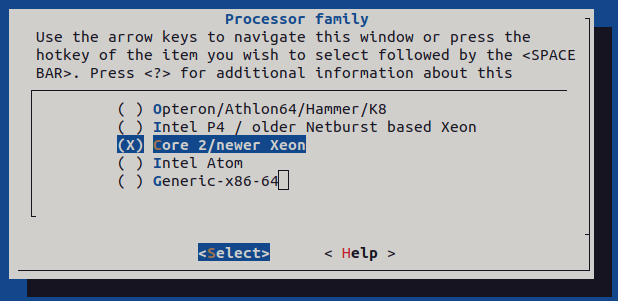
Processor family > Core 2/newer Xeon 선택
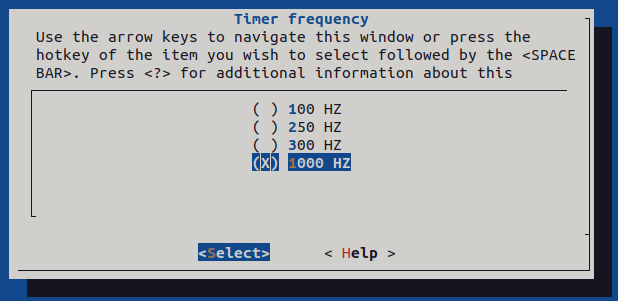
Timer frequency > 1000Hz 선택
Multi-core scheduler support > CPU core priorities scheduler support > 비활성화

2.3.3. Power Management and ACPI options
CPU Frequency scaling > CPU Frequency scaling > 비활성화

ACPI (Advanced Configuration and Power Interface) Support > Processor > 비활성화

CPU Idle > CPU idle PM support > 비활성화

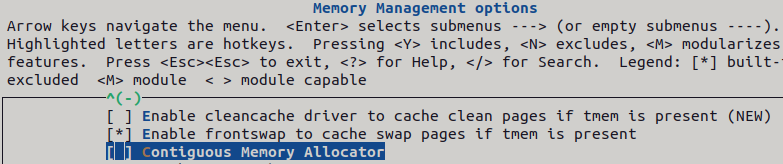
2.3.4. Memory Management options
Allow for memory compaction > 비활성화

Contiguous Memory Allocator > 비활성화
Page migration > 비활성화

2.3.5. Kernel hacking
Generic Kernel Debugging Instruments > KGDB: kernel debugger > 비활성화
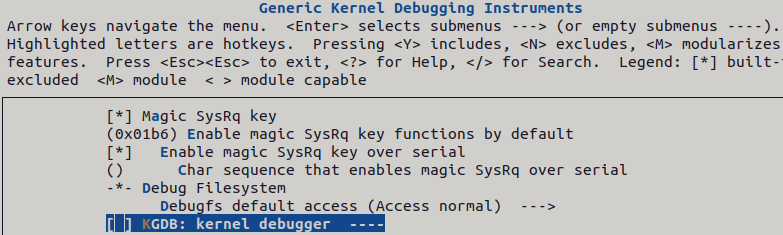
Compile-time checks and compiler options > Compile the kernel with debug info > 비활성화

2.3.6. Cryptographic API
Certificates for signature checking > Additional X.509 keys for default system keyring > 공백
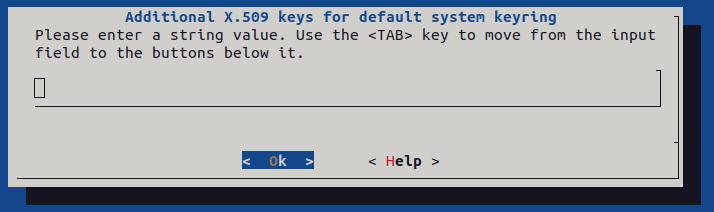
Certificates for signature checking > X.509 certificates to be preloaded into the system blacklist keyring > 공백

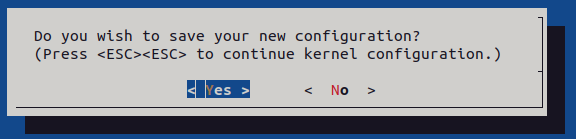
2.3.7. 설정 저장 후 종료
위에서 언급한 설정 외에도 실시간성 보장 및 커널 용량 최소화(사용하지 않는 하드웨어 드라이버 제외)를 위한 다양한 옵션들이 존재하니, 본인 입맛에 맞게 커스터마이즈해주면 된다
2.4. 커널 빌드 및 설치
$ cd ~/kernel/linux-5.15.137
$ sudo make -j`nproc`
$ sudo make -j`nproc` modules
$ sudo make -j`nproc` modules_install
$ sudo make -j`nproc` install
※ 빌드는 상당히 오래 걸린다 (PC 사양에 따라 다소 차이는 있겠으나, 대충 1~2시간으로 생각하면 된다)
빌드 및 설치 완료 후 /lib/modules 경로 확인

2.5. 커널 부팅 설정 (부트로더)
2개 이상의 리눅스 커널을 설치하게 되면 PC 부팅 시 부트로더를 통해 커널을 선택할 수 있다 (멀티부팅 개념)
부팅할 때마다 커널을 선택하는 건 번거로우므로, 부트로더 선택 화면을 비활성화하고 RT 커널을 default로 로딩하도록 설정해보자
Grub(Grand Unified Bootloader) 설정을 열어 RT 커널 설치 후 부트로더 부팅 순서를 확인해보자
$ cat /boot/grub/grub.cfg | egrep 'menuentry |submenu ' | awk -F"'" '{print $1 $2}'
위 화면에서 부팅 인덱스는 다음과 같이 설정된다
menuentry Ubuntu --- 0
submenu Advanced options for Ubuntu --- 1
menuentry Ubuntu, with Linux 6.2.0-36-generic --- 1>0
menuentry Ubuntu, with Linux 6.2.0-36-generic (revocery mode) --- 1>1
menuentry Ubuntu, with Linux 6.2.0-26-generic --- 1>2
menuentry Ubuntu, with Linux 6.2.0-26-generic (recovery mode) --- 1>3
menuentry Ubuntu, with Linux 5.15.137-rt71 --- 1>4
menuentry Ubuntu, with Linux 5.15.137-rt71 (recovery mode) --- 1>5
menuentry UEFI Firmware Settings --- 2
default로 선택해야 할 RT커널의 인덱스는 1>4 인 것을 기억해두자
Grub(Grand Unified Bootloader) 설정파일을 수정해주자 (nano, vi 등 에디터 사용)
$ sudo nano /etc/default/grub
GRUB_DEFAULT에 "1>4"를 설정해 RT커널을 기본값으로 로딩하게 한 뒤, GRUB_TIMEOUT_STYLE을 hidden, GRUB_TIMEOUT을 0으로 설정하면 부팅 시 커널 선택 창이 더 이상 뜨지 않게 된다
GRUB_DEFAULT="1>4"
GRUB_TIMEOUT_STYLE=hidden
GRUB_TIMEOUT=0
GRUB_DISTRIBUTOR=`lsb_release -i -s 2> /dev/null || echo Debian`
이 외에도 아래와 같이 커널 커맨드라인(Command Line)을 추가해 실시간성을 확보하도록 하자
(솔직히 커널 커맨드라인은 나도 면밀히 살펴본 적이 없어서 그냥 전문가가 시키는대로 따라만 한다... ㅠ)
GRUB_CMDLINE_LINUX_DEFAULT="quiet splash"
GRUB_CMDLINE_LINUX=""
# additional kernel parameters
GRUB_CMDLINE_LINUX=$GRUB_CMDLINE_LINUX" net.ifnames=0"
GRUB_CMDLINE_LINUX=$GRUB_CMDLINE_LINUX" biosdevname=0"
GRUB_CMDLINE_LINUX=$GRUB_CMDLINE_LINUX" cpuidle.off=1"
GRUB_CMDLINE_LINUX=$GRUB_CMDLINE_LINUX" intel_idle.max_cstate=0"
GRUB_CMDLINE_LINUX=$GRUB_CMDLINE_LINUX" cpufreq.off=1"
GRUB_CMDLINE_LINUX=$GRUB_CMDLINE_LINUX" processor.max_cstate=0"
GRUB_CMDLINE_LINUX=$GRUB_CMDLINE_LINUX" processor_idle.max_cstate=0"
GRUB_CMDLINE_LINUX=$GRUB_CMDLINE_LINUX" intel_pstate=disable"
GRUB_CMDLINE_LINUX=$GRUB_CMDLINE_LINUX" rcupdate.rcu_cpu_stall_suppress=1"
GRUB_CMDLINE_LINUX=$GRUB_CMDLINE_LINUX" idle=poll"
GRUB_CMDLINE_LINUX=$GRUB_CMDLINE_LINUX" nohz_full=3"
GRUB_CMDLINE_LINUX=$GRUB_CMDLINE_LINUX" isolcpus=3"
GRUB_CMDLINE_LINUX=$GRUB_CMDLINE_LINUX" rcu_nocbs=3"
GRUB_CMDLINE_LINUX=$GRUB_CMDLINE_LINUX" irqaffinity=0"
GRUB_CMDLINE_LINUX=$GRUB_CMDLINE_LINUX" i915.enable_rc6=0"
GRUB_CMDLINE_LINUX=$GRUB_CMDLINE_LINUX" i915.enable_dc=0"
GRUB_CMDLINE_LINUX=$GRUB_CMDLINE_LINUX" i915.disable_power_well=0"
GRUB_CMDLINE_LINUX=$GRUB_CMDLINE_LINUX" i915.enable_guc=2"
GRUB_CMDLINE_LINUX=$GRUB_CMDLINE_LINUX" ide-core.nodma=0.0"
GRUB_CMDLINE_LINUX=$GRUB_CMDLINE_LINUX" libata.dma=0"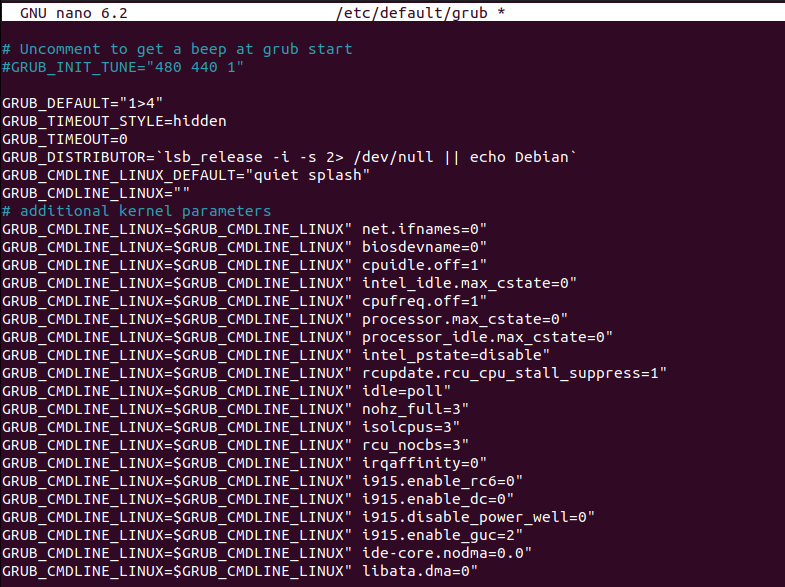
변경 사항을 적용해주자
$ sudo update-grub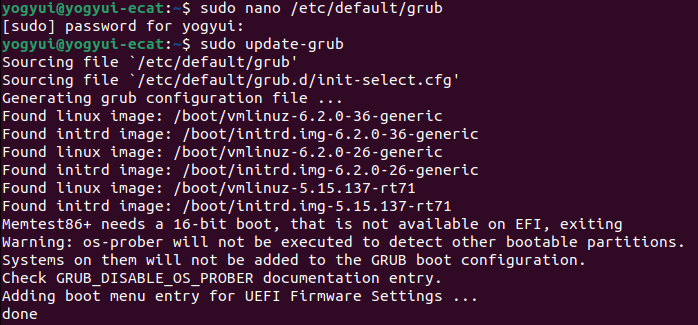
변경 적용 후 재부팅한 뒤 uname으로 시스템 정보를 확인해보면 5.15.137-rt71 커널이 정상적으로 로드된 것을 확인할 수 있다
$ sudo reboot
$ uname -a
[중요]
커널 설치가 완료되었다고 해서 커널 빌드 결과물들을 지우면 안된다 (빌드 후에는 가만히 내버려두자)
이유: IgH EtherCAT Master 소스코드 빌드 시 활성화된 커널 라이브러리 파일들이 반드시 필요하다
3. BIOS(바이오스) 설정
본 글에서 제시하는 BIOS 설정들은 실시간성(Real-Time) 확보를 위한 것으로, PC의 체감 성능이 확연히 저하될 수 있다
(예: 하이퍼스레딩 비활성화 = 코어 1개당 스레드 최대 1개만 구동 = 멀티스레딩 불가능)
즉, 일반 용도의 PC로 사용하기에 매우 부적합해진다는 것을 유념해야 한다
위에서 언급한 설정 외에도 BIOS 종류마다 실시간성 보장을 위한 옵션의 존재 유무가 다를 수 있으니, 본인 PC의 BIOS가 실시간성 보장을 위해 어떤 설정을 해줘야하는지 꼼꼼히 조사해보길 권장한다
3.1. Advanced > CPU Configuration
- Intel (VMX) Virtualization Technology: Disabled
- Hyper-Threading: Disabled

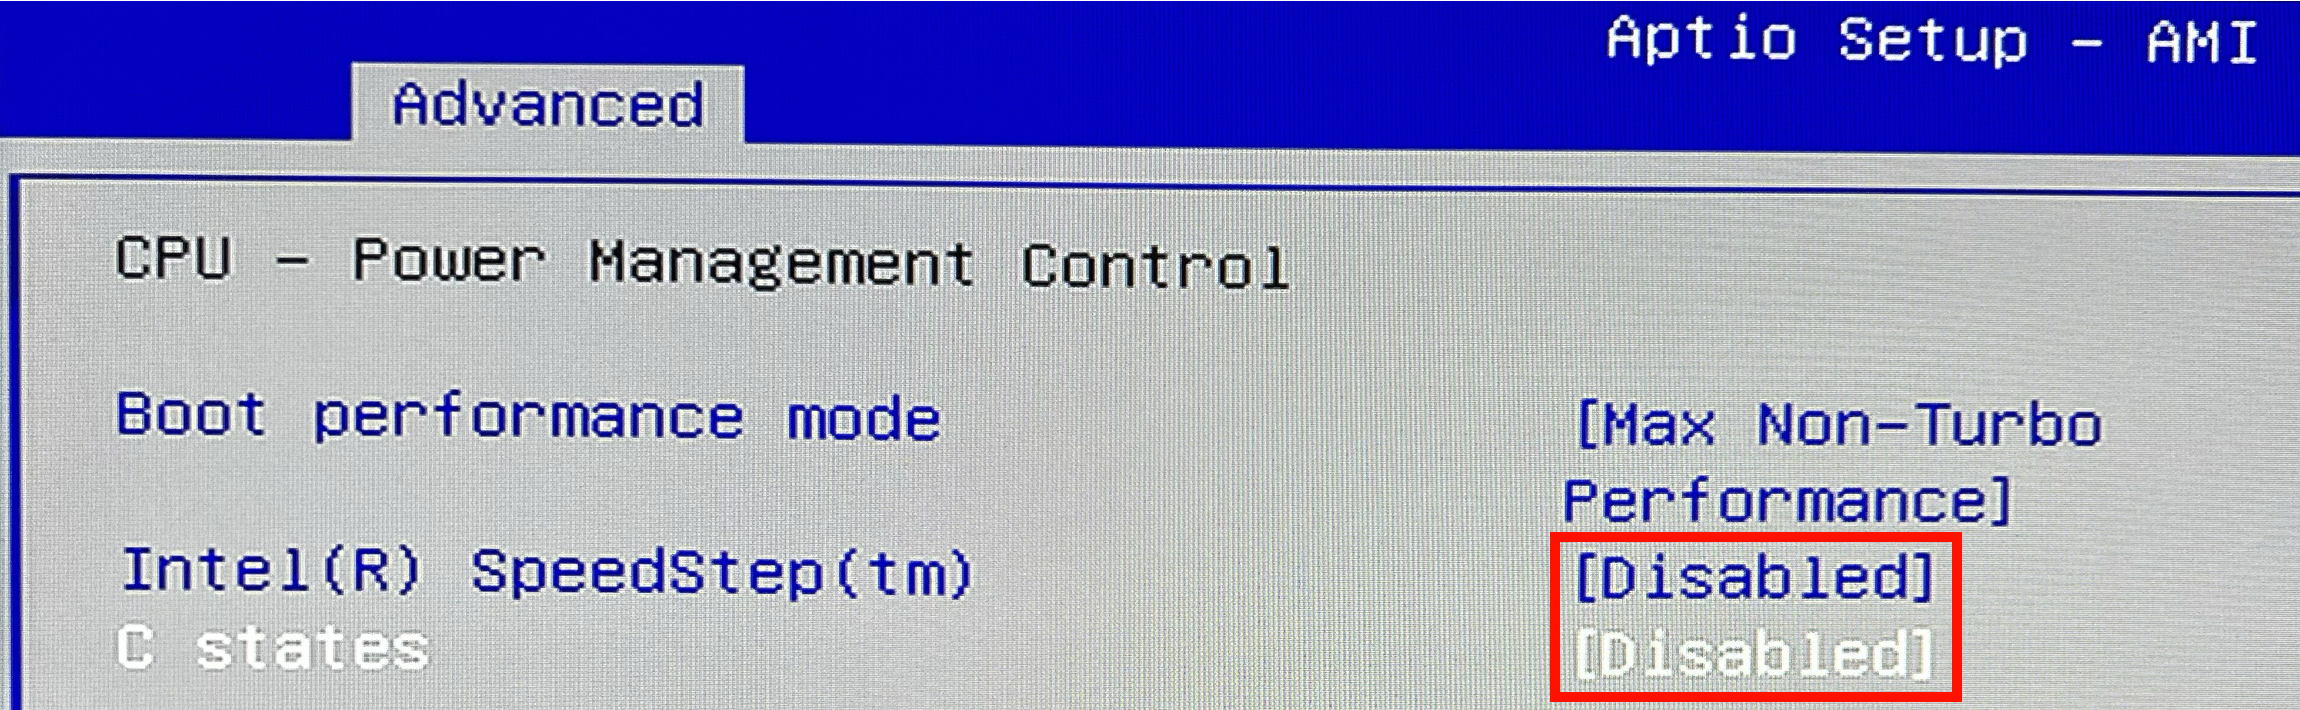
3.2. Advanced > Power & Performance > CPU - Power Management Control
- Intel(R) SpeedStep(tm): Disabled
- C states: Diabled
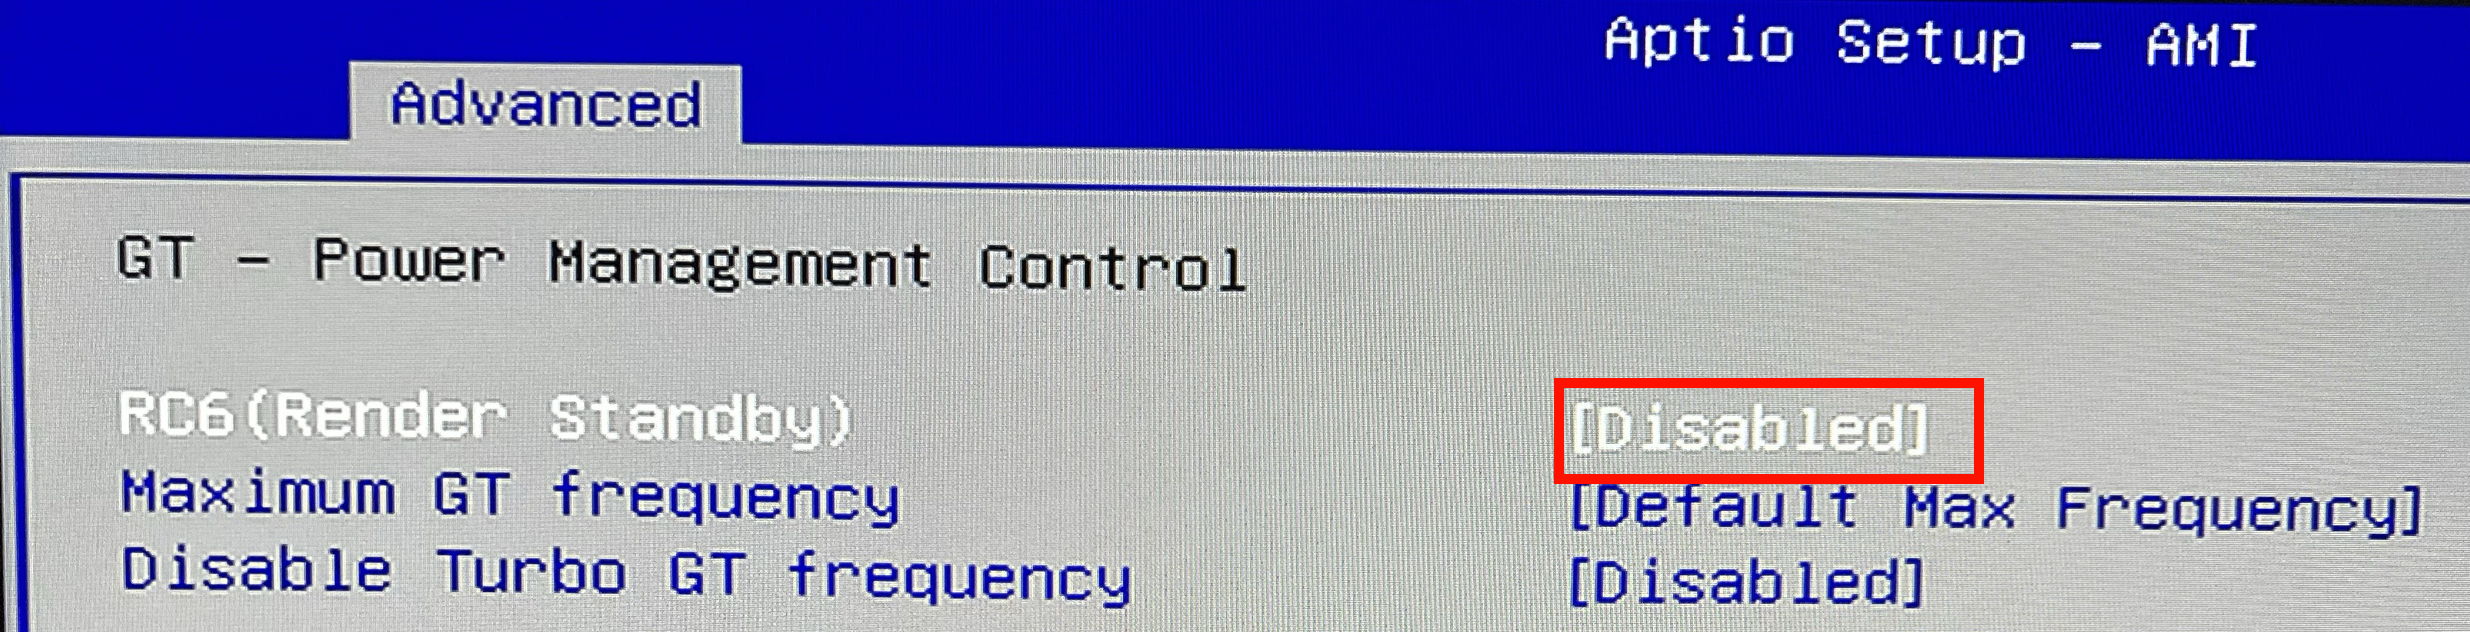
3.3. Advanced > Power & Performance > GT - Power Management Control
- RC6(Render Standby): Disabled
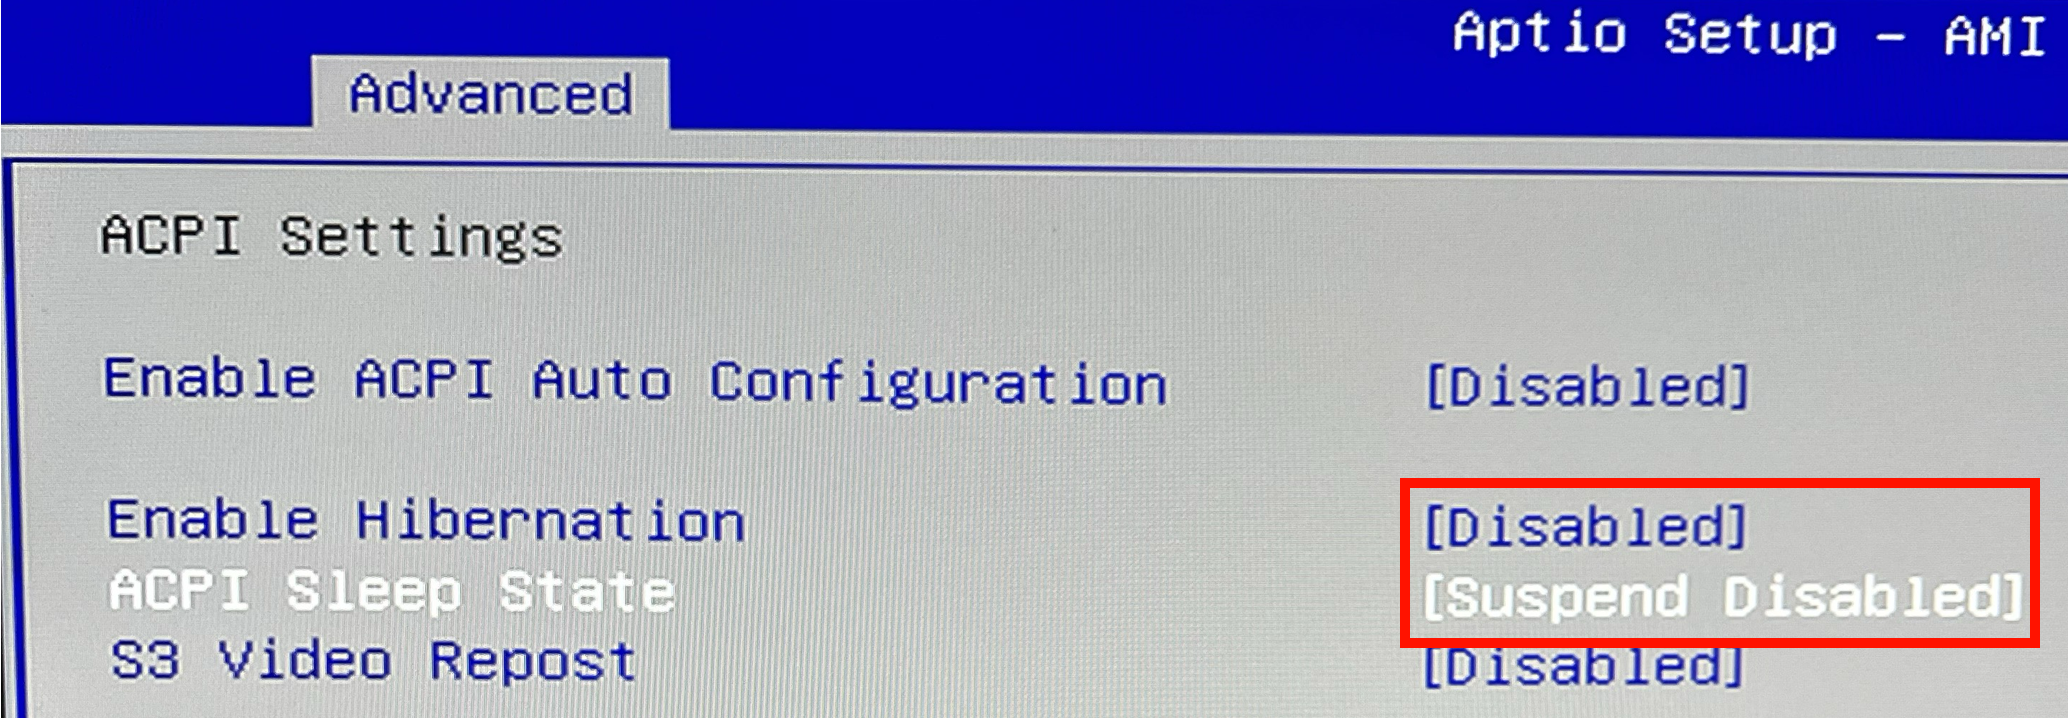
3.4. Advanced > ACPI Settings
- Enable Hibernation: Disabled
- ACPI Sleep State: Suspend Disabled
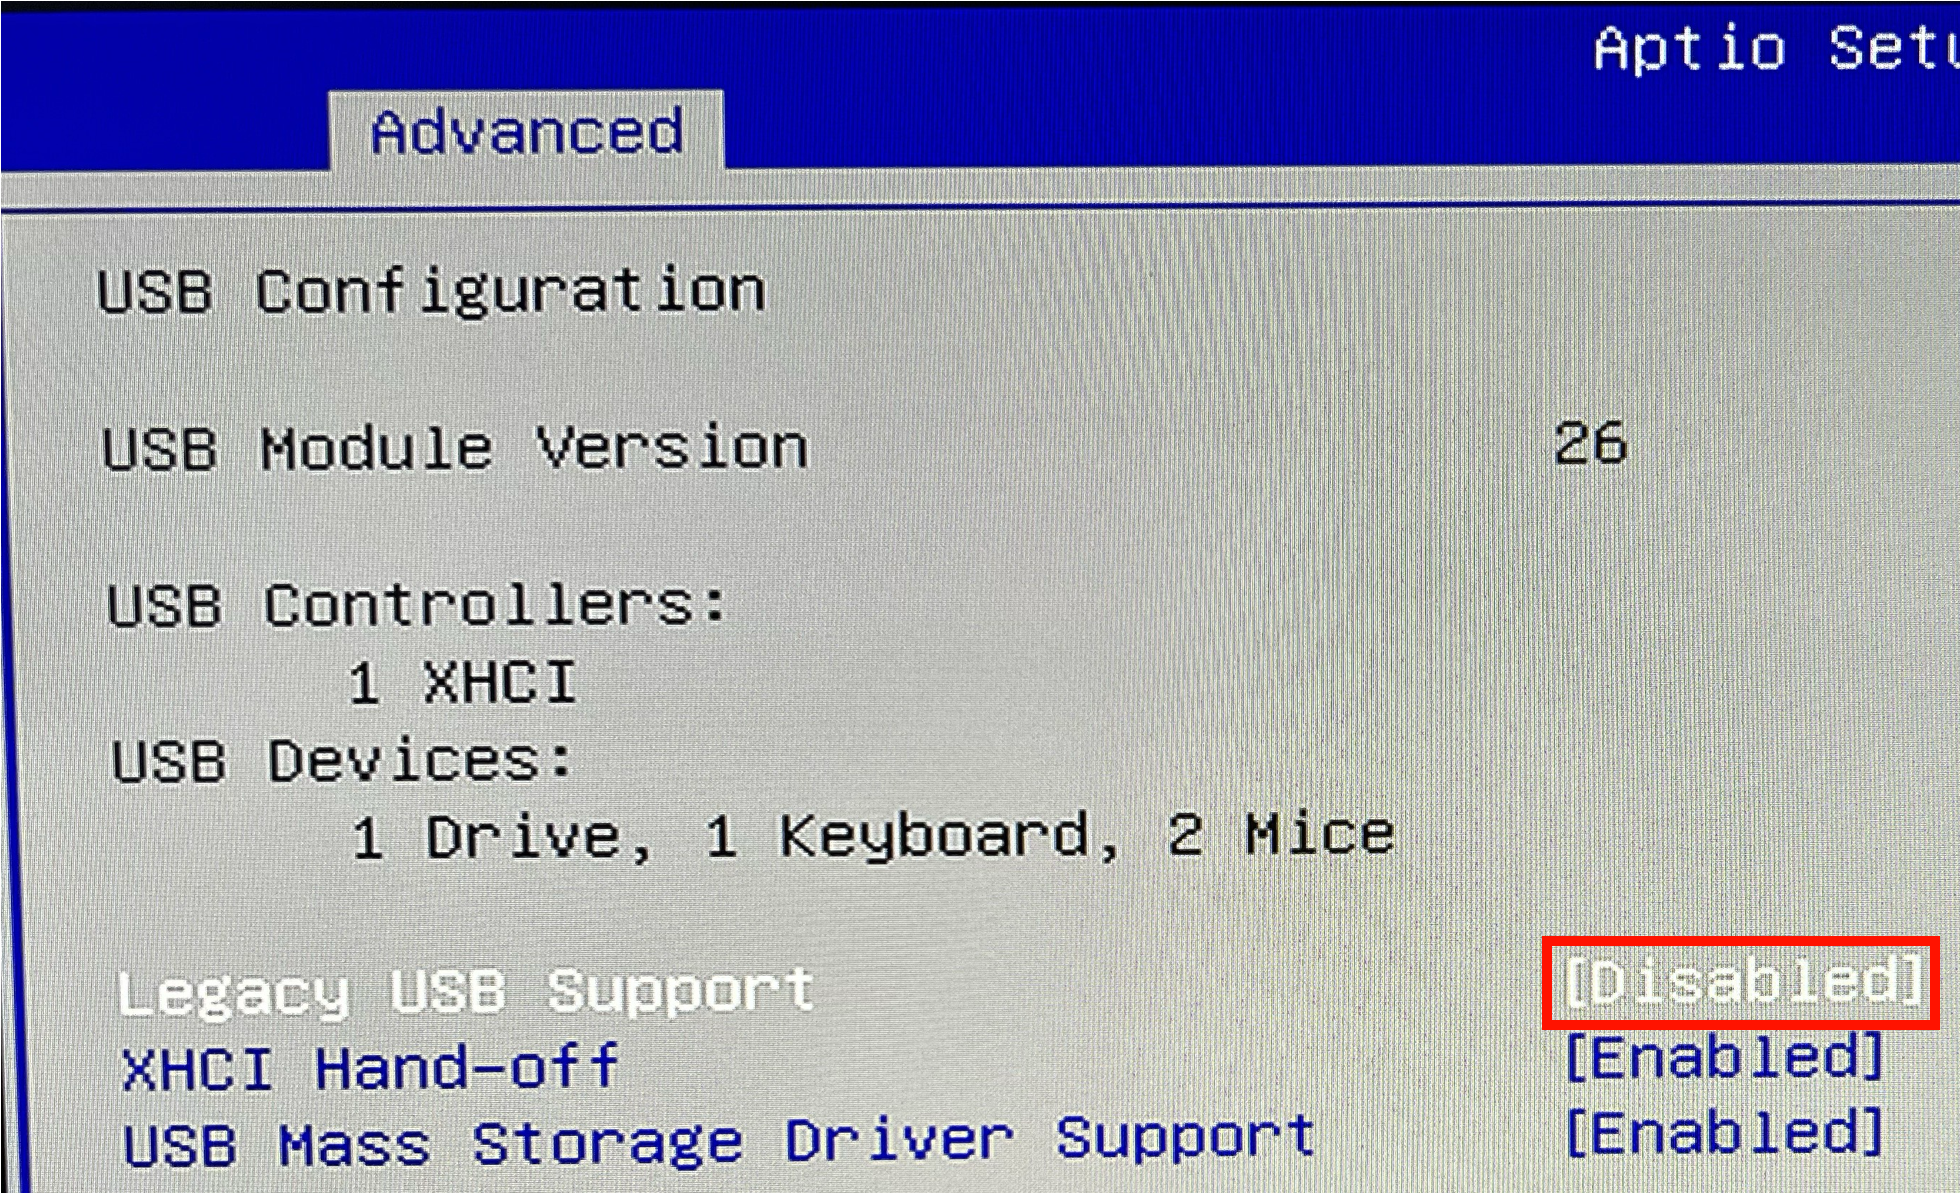
3.5. Advanced > USB Configuration
- Legacy USB Support: Disabled
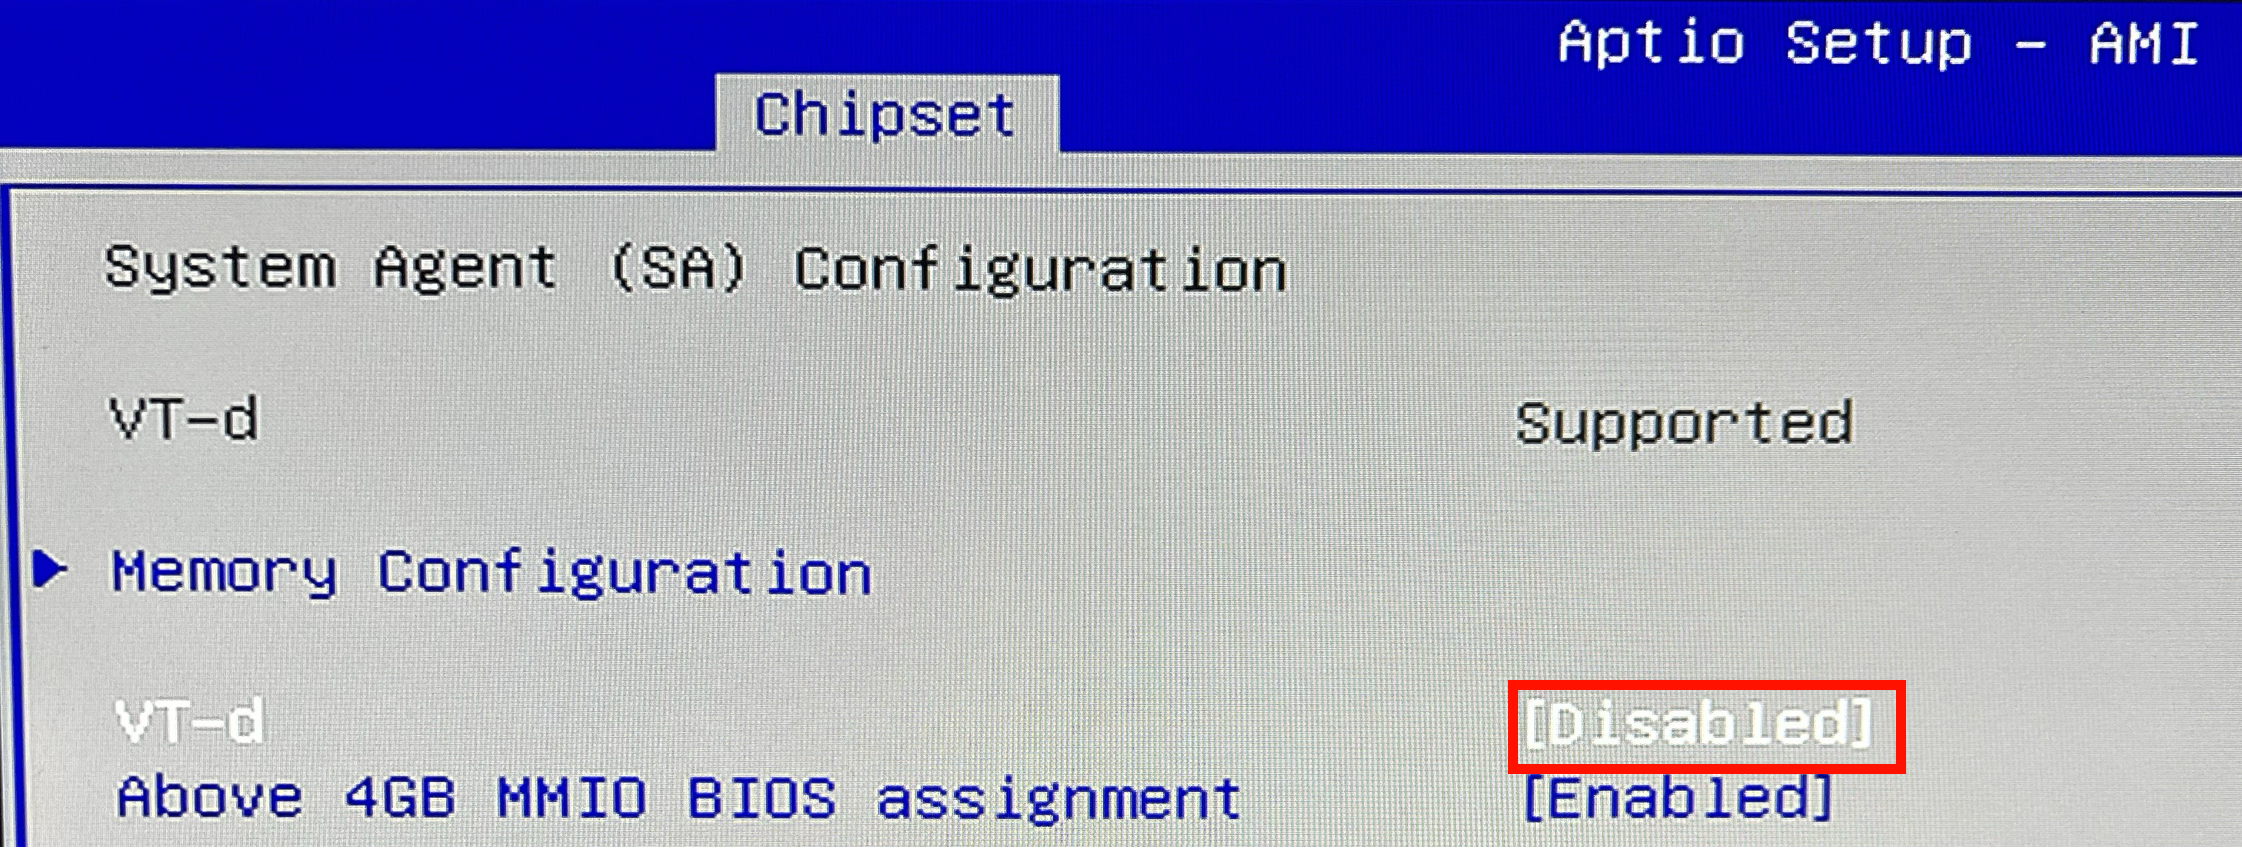
3.6. Chipset > System Agent(SA) Configuration
- VT-d: Disabled
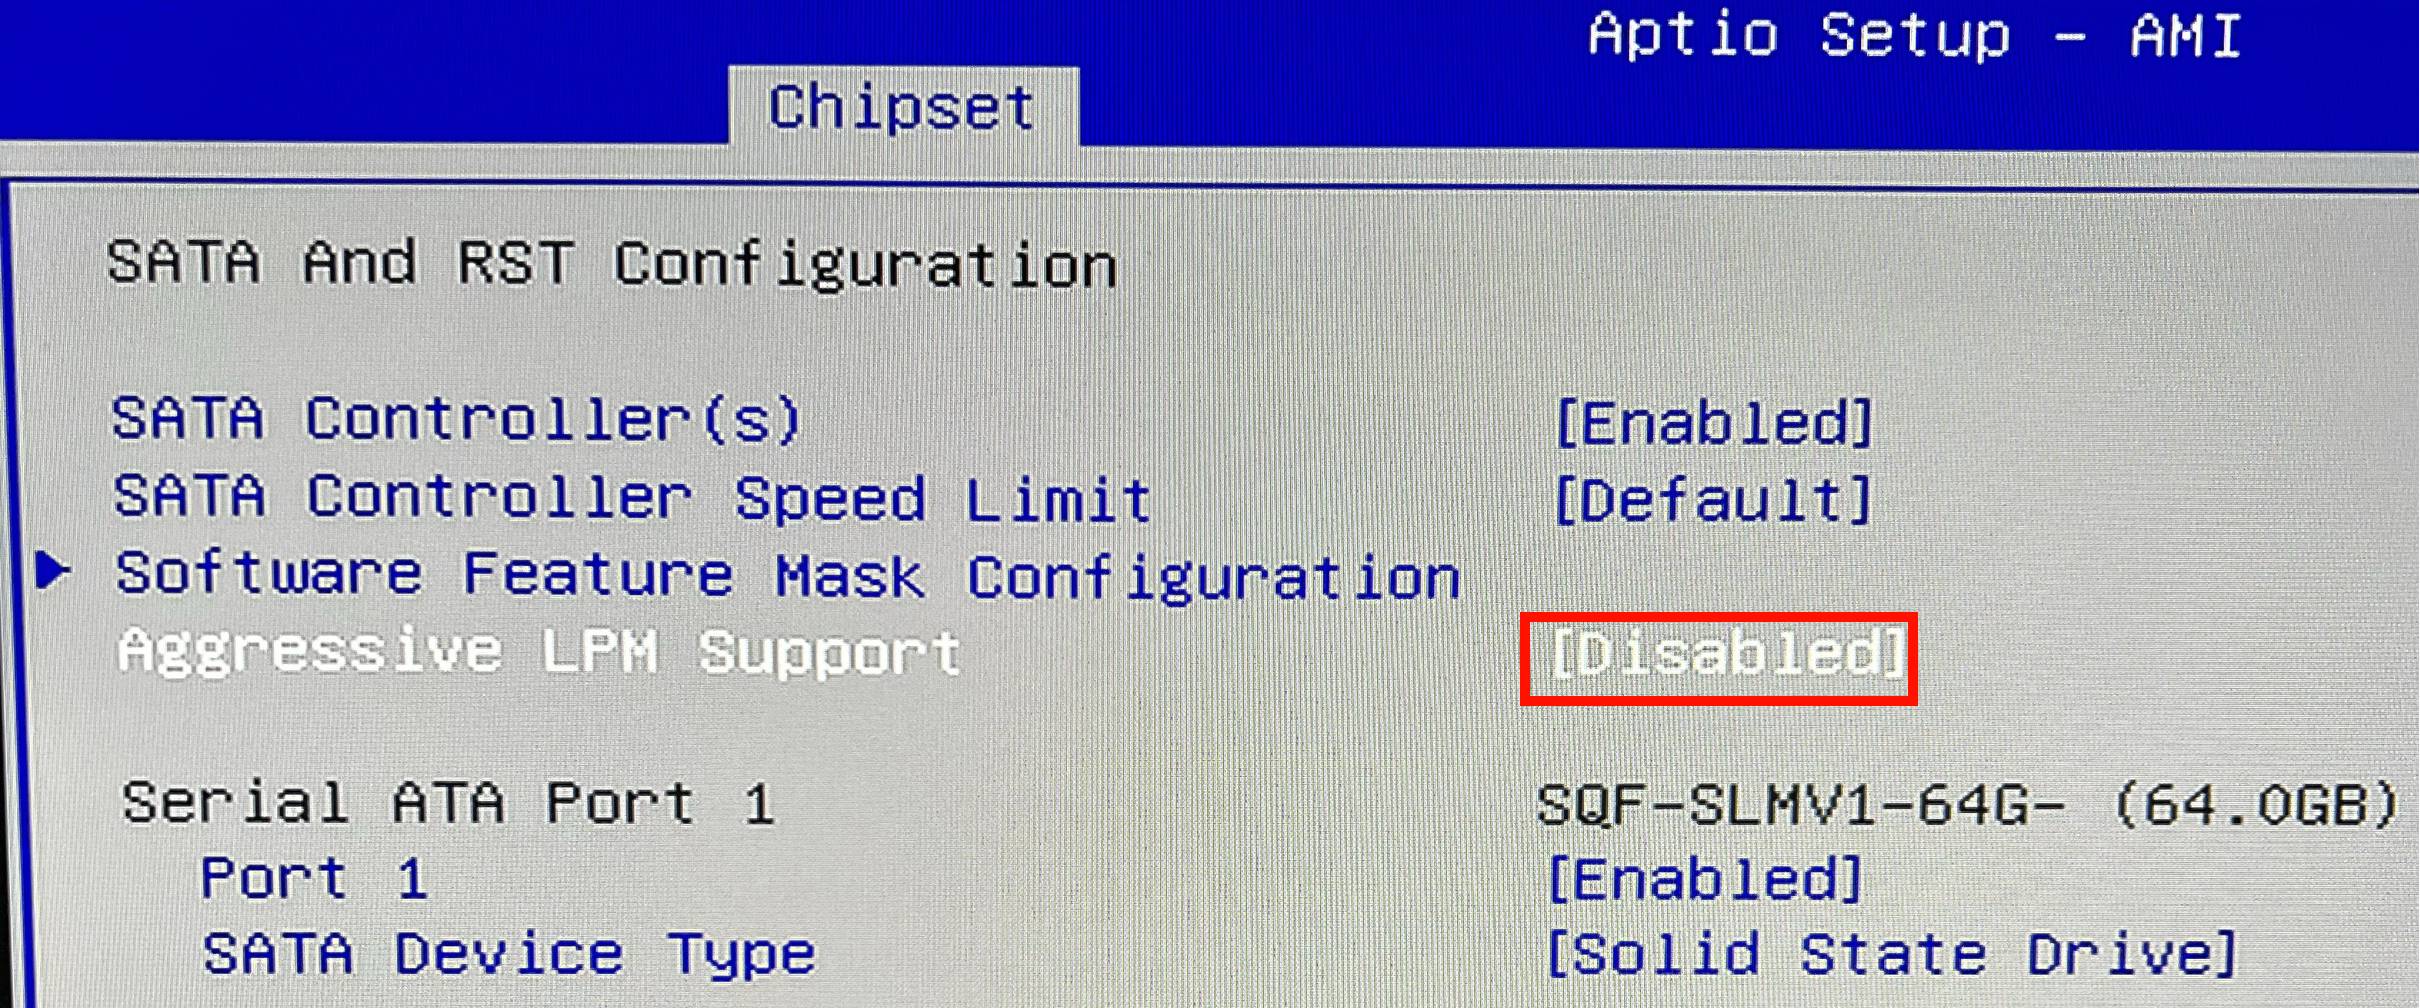
3.7. Chipset > PCH-IO Configuration > SATA And RST Configuration
- Aggressive LPM Support: Disabled
4. IgH EtherCAT Master 설치
EtherLab의 개발한 오픈소스 IgH EtherCAT Master는 소스코드를 가져와 로드된 커널의 이더넷 드라이버 등 라이브러리를 참고해 빌드하여 사용해야 한다
4.1. 소스코드 가져오기 (Clone GitHub repository)
임의의 경로(이 글에서는 ~/tools)를 생성해 리포지터리를 클론한 뒤 stable-1.5 태그를 체크아웃해준다
$ mkdir ~/tools
$ cd ~/tools
$ git clone https://gitlab.com/etherlab.org/ethercat.git
$ cd ethercat
$ git checkout stable-1.5

4.2. 소스코드 빌드 및 설치
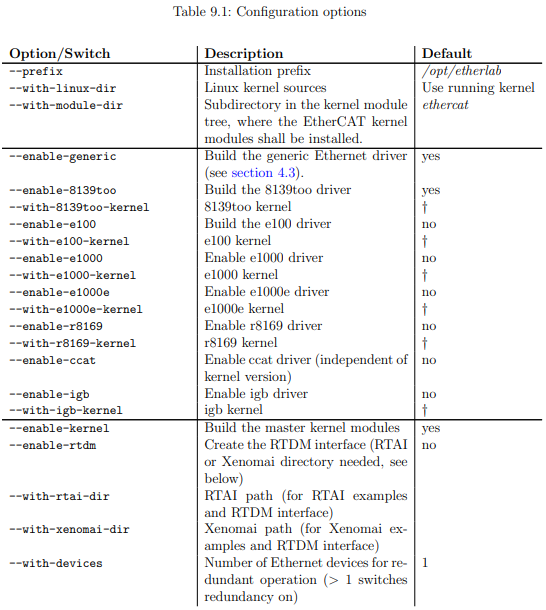
./configure 스크립트를 통해 빌드 설정을 해야하는데, 아래 pdf 문서를 꼼꼼히 읽어보고 본인의 환경에 맞는 설정을 해줘야 한다
$ cd ~/tools/ethercat
$ autoupdate
$ ./bootstrap
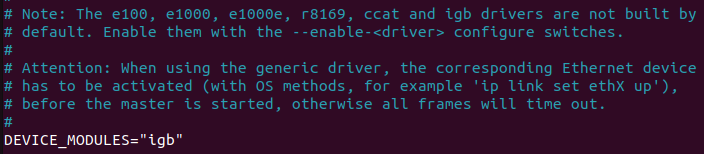
$ sudo ./configure --prefix=/opt/etherlab --sysconfdir=/etc --enable-cycles=yes --enable-hrtimer=yes --enable-8139too=no --enable-generic=yes --enable-igb=yes --enable-e1000=no --enable-e1000e=no --enable-sii-assign=no --enable-eoe=no
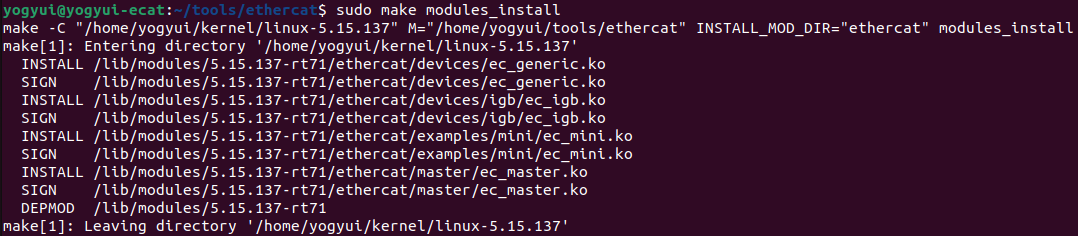
$ sudo make
$ sudo make modules
$ sudo make modules_install
$ sudo make install
$ sudo depmod터미널 출력을 보면 모듈 설치 시 RT 커널 경로를 참조하는 것을 알 수 있다
설치가 정상적으로 완료되면 아래 두 경로에서 EtherCAT Master 구동 시 필요한 두 바이너리 파일을 확인할 수 있다 (ehtercat, ethercatctl)
$ ls /opt/etherlab/bin
$ ls /opt/etherlab/sbin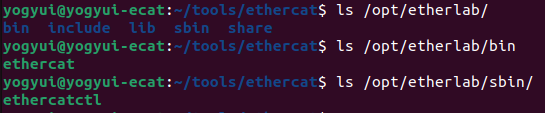
4.3. 환경 설정
4.3.1. 심볼릭 링크 생성
ethercat, ethercatctl 두 바이너리 실행파일을 어디서든지 호출할 수 있게 심볼링 링크를 생성해준다
$ sudo ln -s /opt/etherlab/bin/ethercat /usr/bin
$ sudo ln -s /opt/etherlab/sbin/ethercatctl /usr/sbin
4.3.2. igb 이더넷 컨트롤러 맥 주소 (MAC address) 확인
IgH EtherCAT Master는 마스터로 사용할 이더넷 포트의 맥 어드레스를 수동으로 입력해줘야 한다
맥 주소 확인을 위해 lspci 명령어 호출
$ sudo lspci -v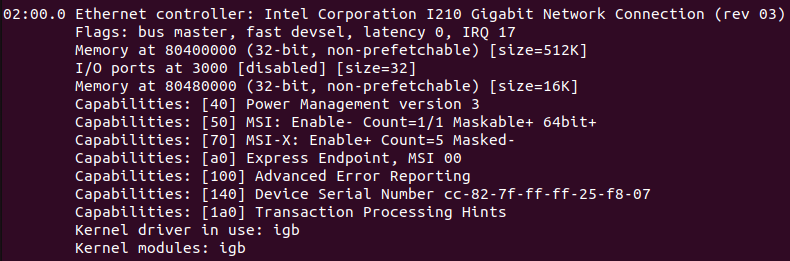
igb 드라이버로 구동되고 있는 포트를 EtherCAT 마스터로 사용할 예정
위 화면에서 맥 주소는 중간에 있는 2개의 ff 를 제외한 cc:82:7f:25:f8:07이 된다
4.3.3. IgH EtherCAT Master 설정 파일 수정
위에서 확인한 맥 주소를 아래 두 파일에 동일하게 아래 그림과 같이 수정해준다
$ sudo nano /etc/ethercat.conf
$ sudo nano /etc/sysconfig/ethercat
4.3.4. udev Rule 생성
$ sudo nano /etc/udev/rules.d/99-EtherCAT.rulesKERNEL=="EtherCAT[0-9]*", MODE="0666"
4.4. 실행
ethercatctl을 호출해 EtherCAT 마스터를 시작할 수 있다
$ sudo ethercatctl start
구동 상태를 확인하려면 아래 명령어를 입력
$ sudo ethercatctl status
5. Real-Time 성능 확인
rt-tests 유틸리티의 cyclictest를 활용해 시스템의 실시간성을 체크해볼 수 있다
$ sudo cyclictest -l100000 -m -a0 -t1 -p99 -i400 -h400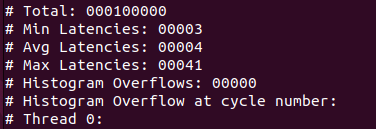
최대 지연시간 41us, 평균 지연시간 4us면 EtherCAT Master로 사용하기에는 충분한 실시간 성능이다
gnuplot을 통해 레이턴시 히스토그램을 시각화할 수도 있다
$ sudo apt-get install gnuplot-qt
아래와 같이 쉘 스크립트 파일을 작성해준다
# 1. Run cyclictest
cyclictest -l100000 -m -Sp90 -i200 -h400 -q >output

# 2. Get maximum latency
max=`grep "Max Latencies" output | tr " " "\n" | sort -n | tail -1 | sed s/^0*//`

# 3. Grep data lines, no empty lines a common field separator
grep -v -e "^#" -e "^$" output | tr " " "\t" >histogram

# 4. Set the number of cores, for example
cores=4

# 5. Create two-column data sets
for i in `seq 1 $cores`
do
  column=`expr $i + 1`
  cut -f1,$column histogram >histogram$i
done

# 6. Create plot command header
echo -n -e "set title \"Latency plot\"\n\
set terminal png\n\
set xlabel \"Latency (us), max $max us\"\n\
set logscale y\n\
set xrange [0:400]\n\
set yrange [0.8:*]\n\
set ylabel \"Number of latency samples\"\n\
set output \"plot.png\"\n\
plot " >plotcmd

# 7. Append plot command data references
for i in `seq 1 $cores`
do
   if test $i != 1
   then
      echo -n ", " >>plotcmd
   fi
   cpuno=`expr $i - 1`
   if test $cpuno -lt 10
   then
      title=" CPU$cpuno"
   else
      title="CPU$cpuno"
   fi
   echo -n "\"histogram$i\" using 1:2 title \"$title\" with histeps" >>plotcmd
   done

# 8. Execute plot command
gnuplot -persist <plotcmd
작성된 스크립트를 호출하면 아래와 같이 히스토그램 이미지를 얻을 수 있다
$ sudo bash cyclictest.sh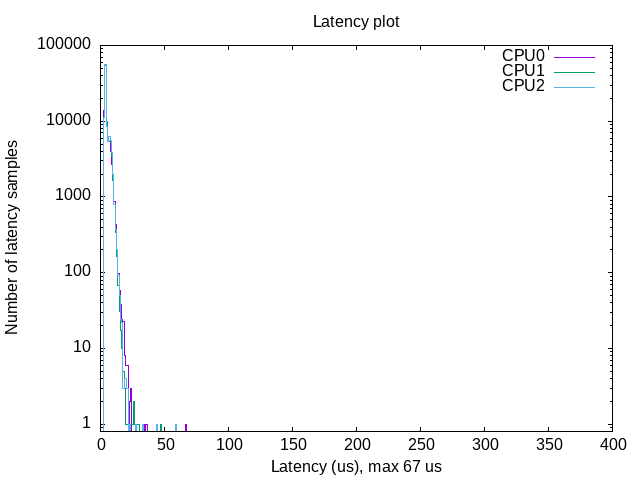
6. 마무리

EtherCAT Driver ROS2 Stack는 2023년 11월 현재 ROS2 Humble 버전을 공식적으로 지원하고 있으며, ros2_control 프레임워크를 설치해야 한다
ROS2 humble, ros2_control, ethercat_driver_ros2 등 ROS2에서 EtherCAT 기반 로봇을 구동하기 위한 환경 설정 방법은 다음 글에서 다뤄보도록 한다
[Reference]
https://gitlab.com/etherlab.org/ethercat
https://www.acontis.com/en/ubuntu-linux-realtime-howto.html
https://www.acontis.com/en/building-a-real-time-linux-kernel-in-ubuntu-preemptrt.html
https://taste.tuxfamily.org/wiki/index.php?title=Tricks_and_tools_for_PREEMPT-RT_kernel
'Software > ROS' 카테고리의 다른 글
| IgH EtherCAT Master SDO 음수값 입력하기 (0) | 2024.07.26 |
|---|---|
| ROS2 - Multiple Robots 환경을 위한 Namespace 설정 방법 (10) | 2024.07.23 |
| ROS2 EtherCAT Beckhoff Digital I/O Slave 구동 예제 (2) | 2023.11.10 |
| ROS2 + IgH EtherCAT Master 구동 환경 구축 (0) | 2023.11.10 |
| EtherCAT Driver ROS2 Stack SDO Async exchange service - ioctl magic difference 문제 해결 방법 (4) | 2023.09.18 |


